1 - Getting Started
1.1 - Installation
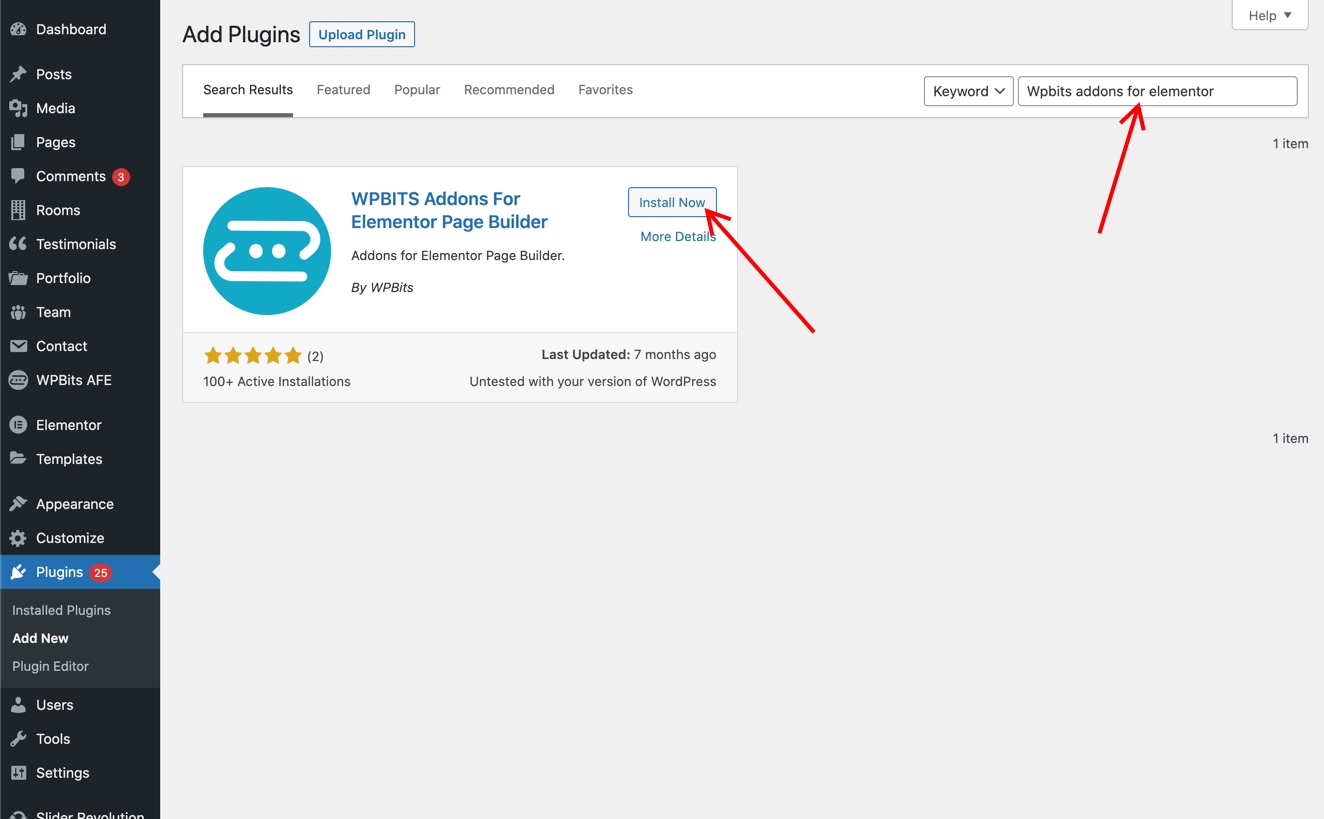
You can install the plugin via your WordPress Admin panel or manually by downloading from this page https://wordpress.org/plugins/wpbits-addons-for-elementor/

1.2 - WPBits Widgets
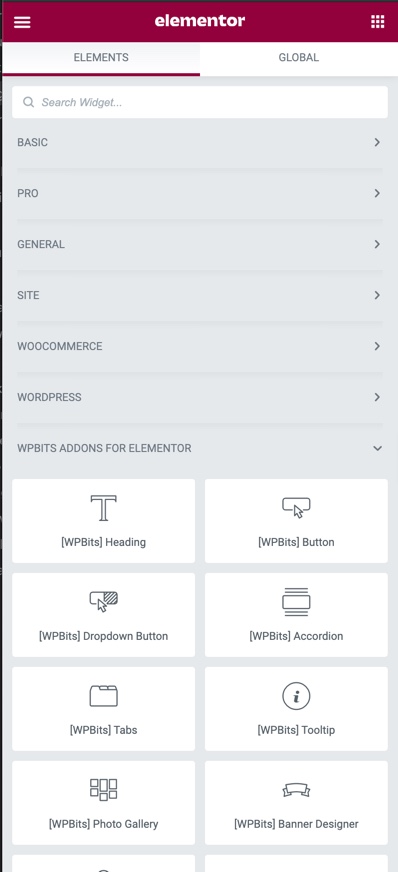
You can find our widgets in the elementor elements panel. Add a widget to your page and edit its settings and contents.
2 - Template Library
2.1 - Template Library
Click to the WPBits logo on the Elementor start section then click any template to import your page.


3 - Upgrade to Pro
3.1 - Upgrading
- Install the free WPBits Addons for Elementor plugin.
- Click the “Upgrade” link under the “WPBits AFE” menu.
- Click “Upgrade Now” button and complete the order.

3.2 - Installing the Pro Version
Step 1: Activate your account
Upon finalizing your order, you’ll get an email with the account activation link like shown below. Click the link to activate the account.

Step 2: Download the PRO version
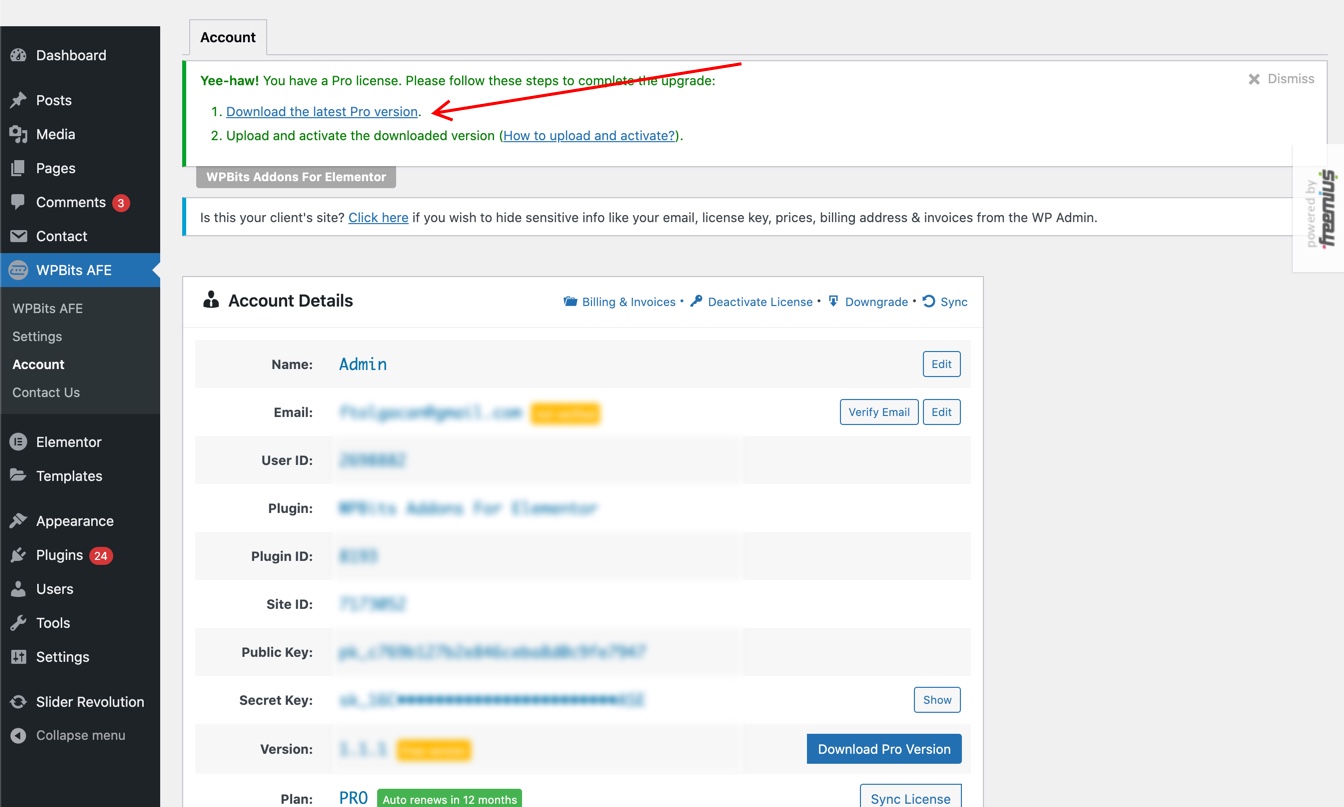
Click the “Download the latest Pro version” link to download the ZIP file.

Step 3: Install the PRO version
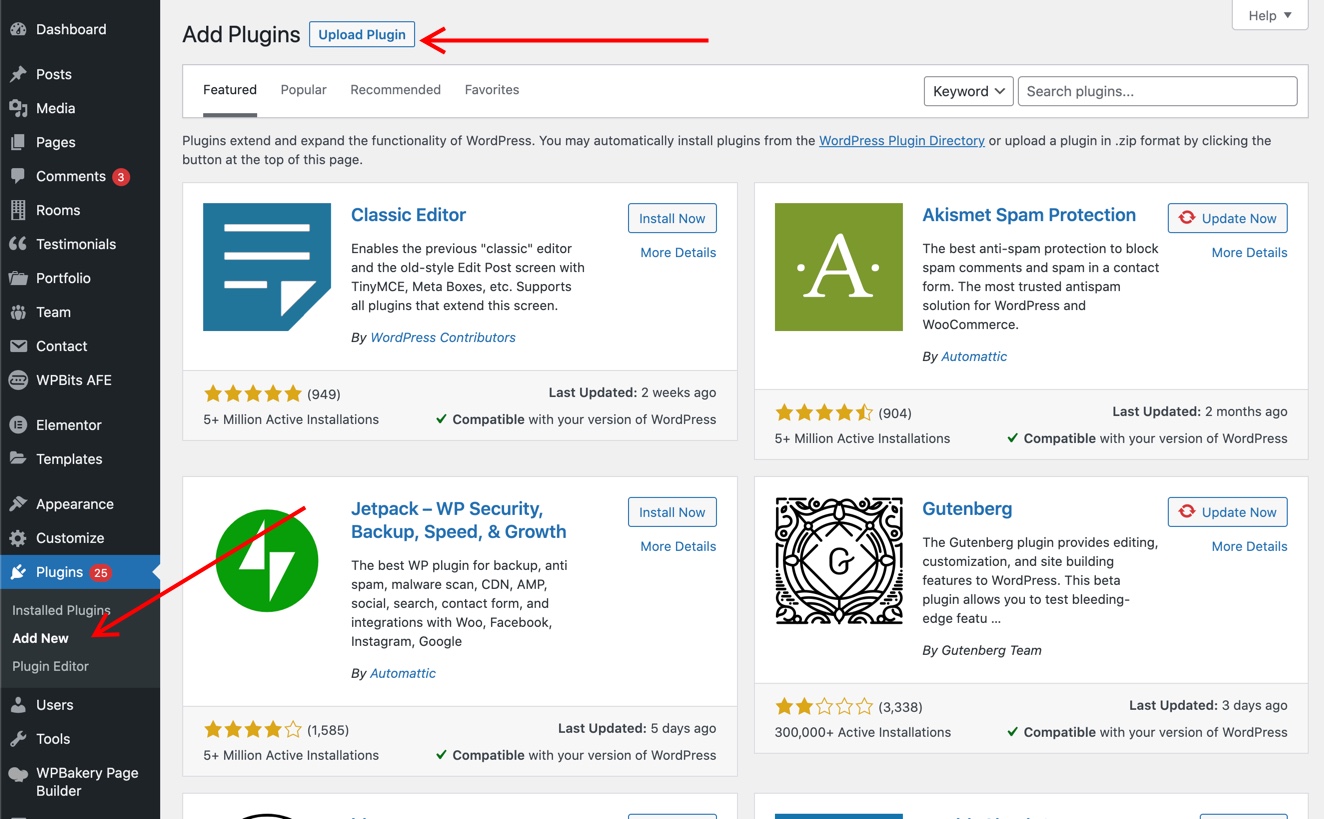
You can easily install the Pro version via the Plugin / Add New (Upload Plugin) screen. Upload the ZIP file and activate the plugin to get pro features.

3.3 - Activating the License
If you move your website from staging to live or installing to a new domain, you’ll need to activate the license. Navigate to the Plugins page and click the “Activate License” link below the plugin name. You can find your License Key inside the “Thanks for upgrading” email sent from WPBits after your purchase.


