

Widgets
Site Navigation
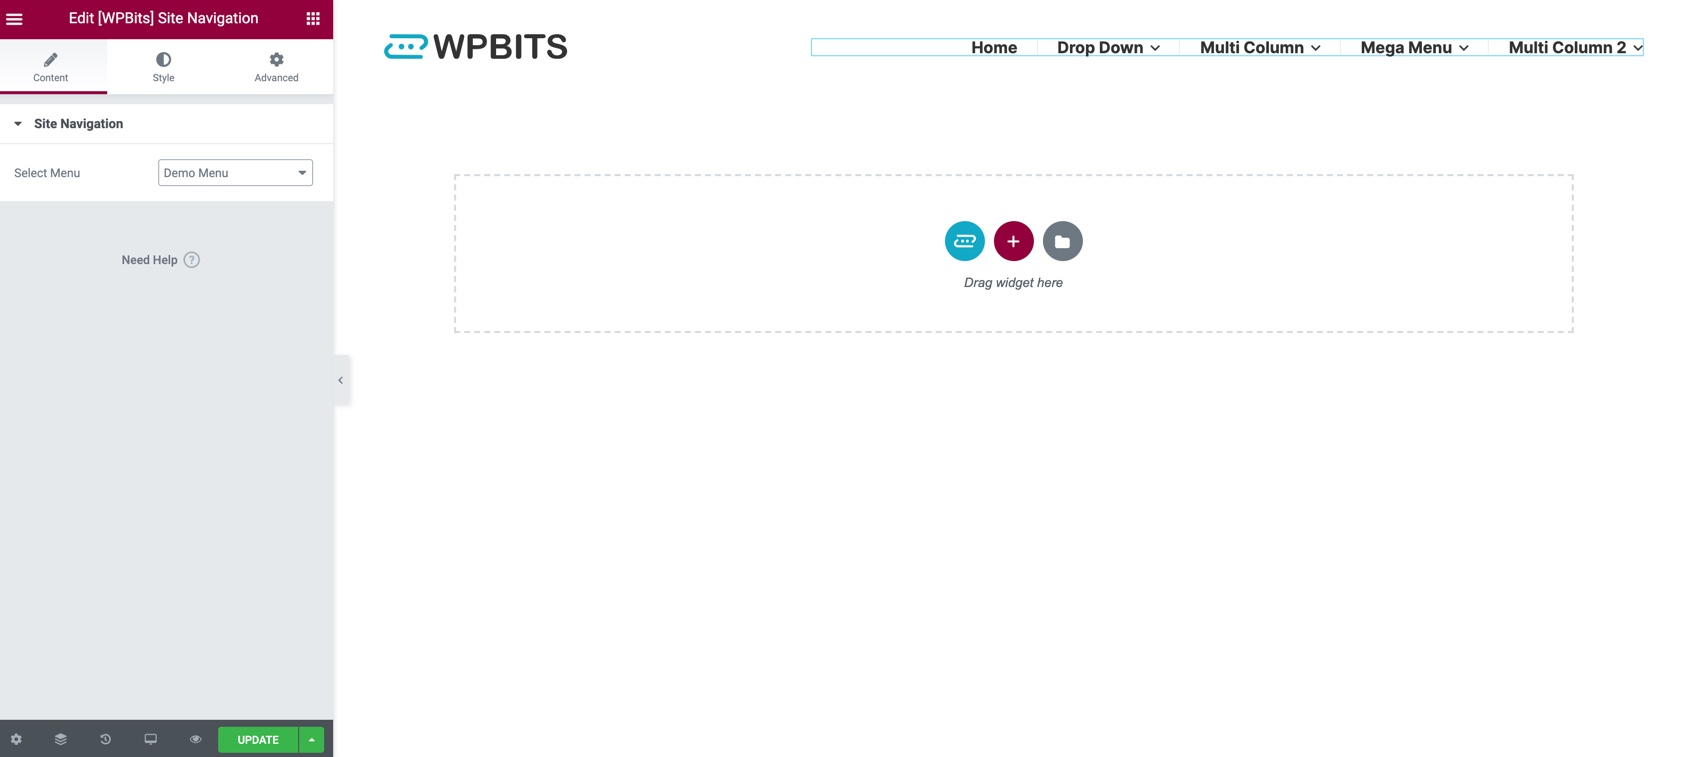
Section titled “Site Navigation”Use the Site Navigation widget to create any navigation menu you want. The widget has been designed to be used in a header or footer template. Add the [WPBits] Site Navigation widget, then select the menu to use in your template. Click on the “Style” tab of the widget to customize it.
Drop Down Menus
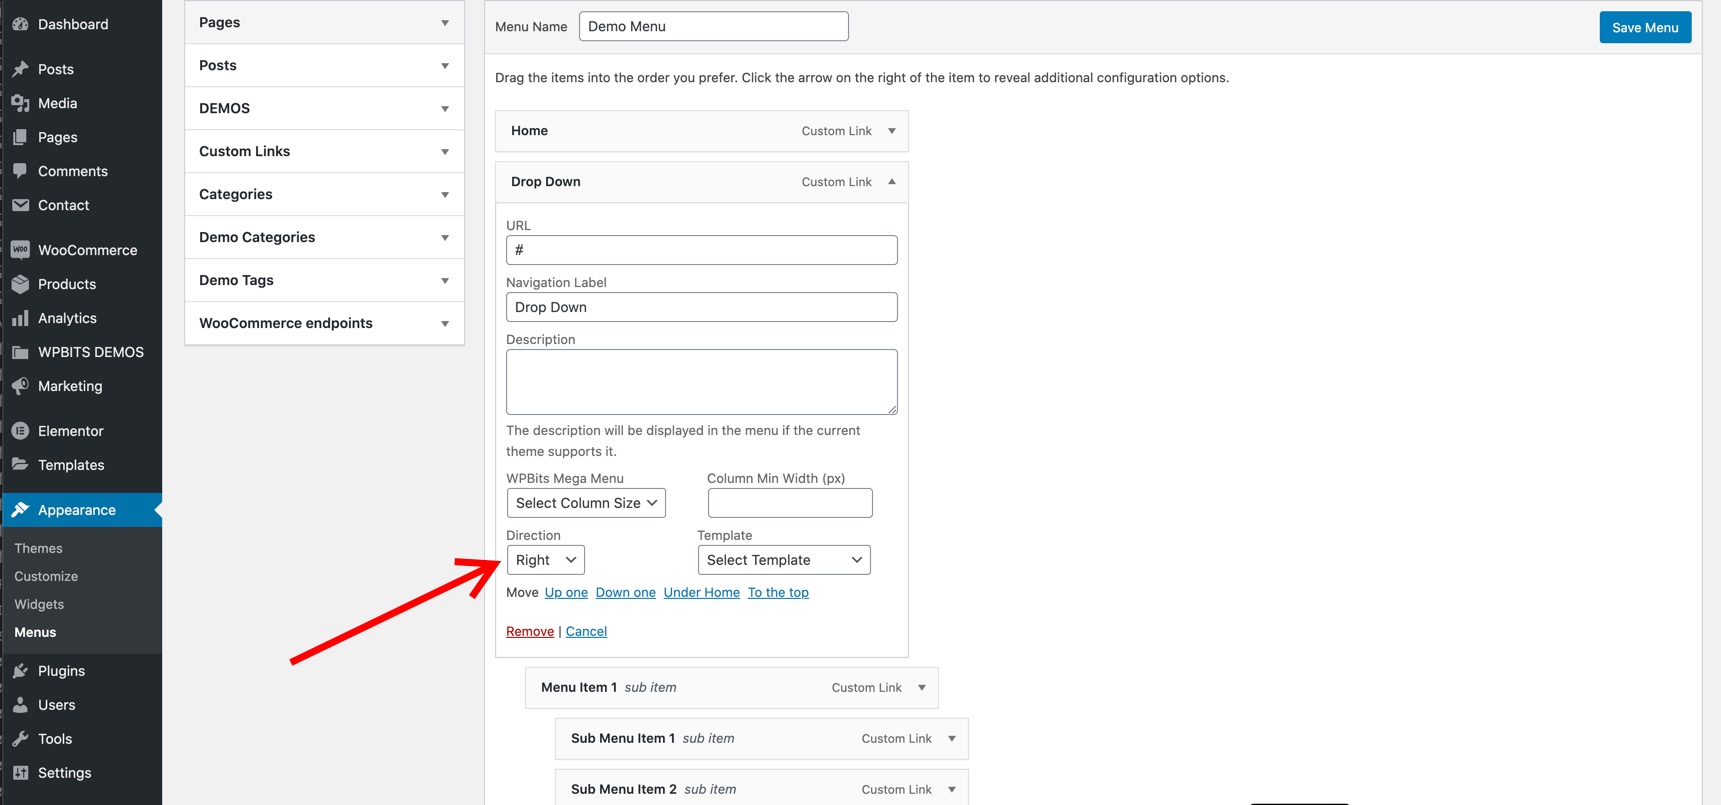
Section titled “Drop Down Menus”You can select the direction of the drop down menu from the settings panel of the top parent menu item.
Multi-Column Drop Down Menus
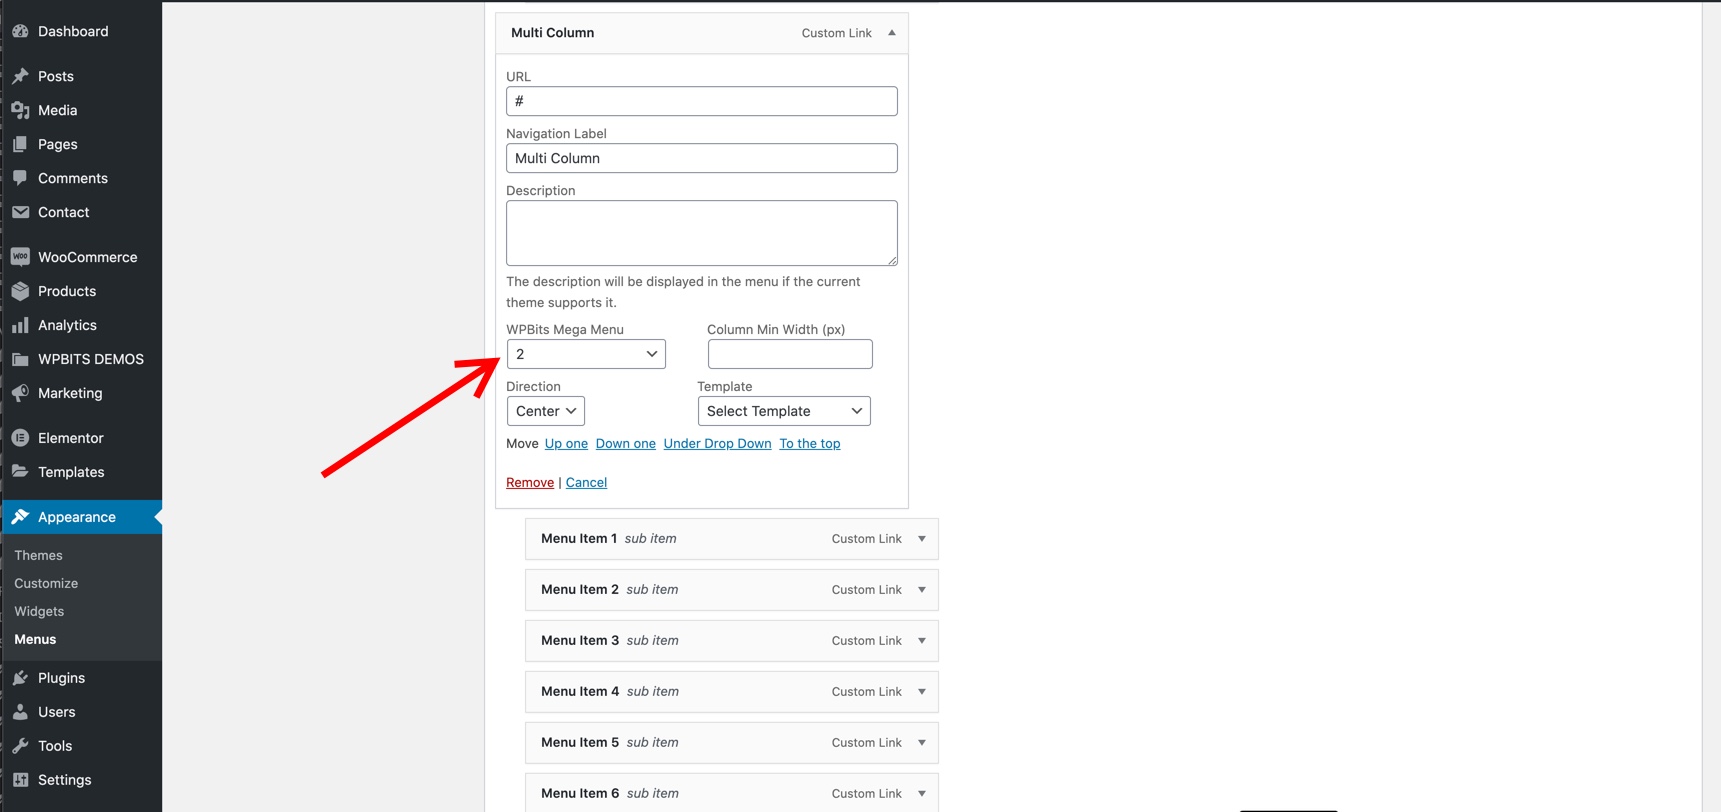
Section titled “Multi-Column Drop Down Menus”To create a multi-column drop-down menu, expand the top-level menu item and choose the column size under the “WPBits Mega Menu” select box. You can also specify the column width and direction.

Mega Menus
Section titled “Mega Menus”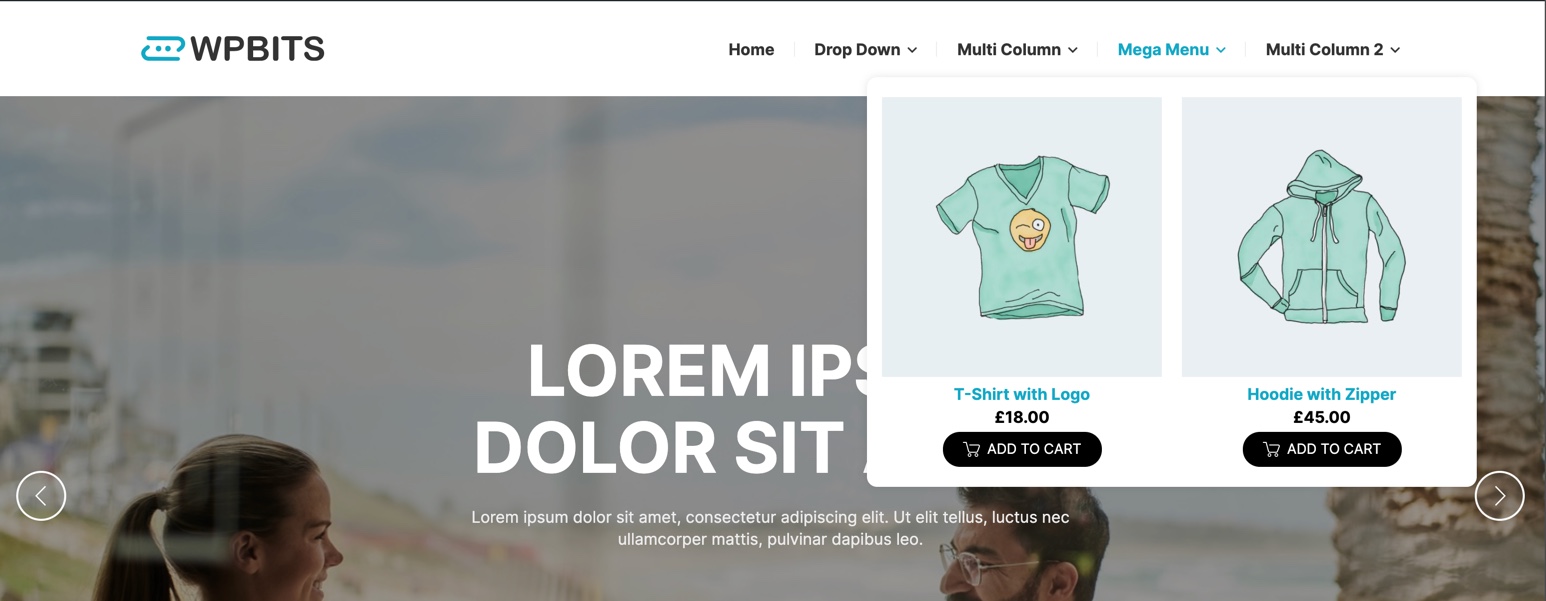
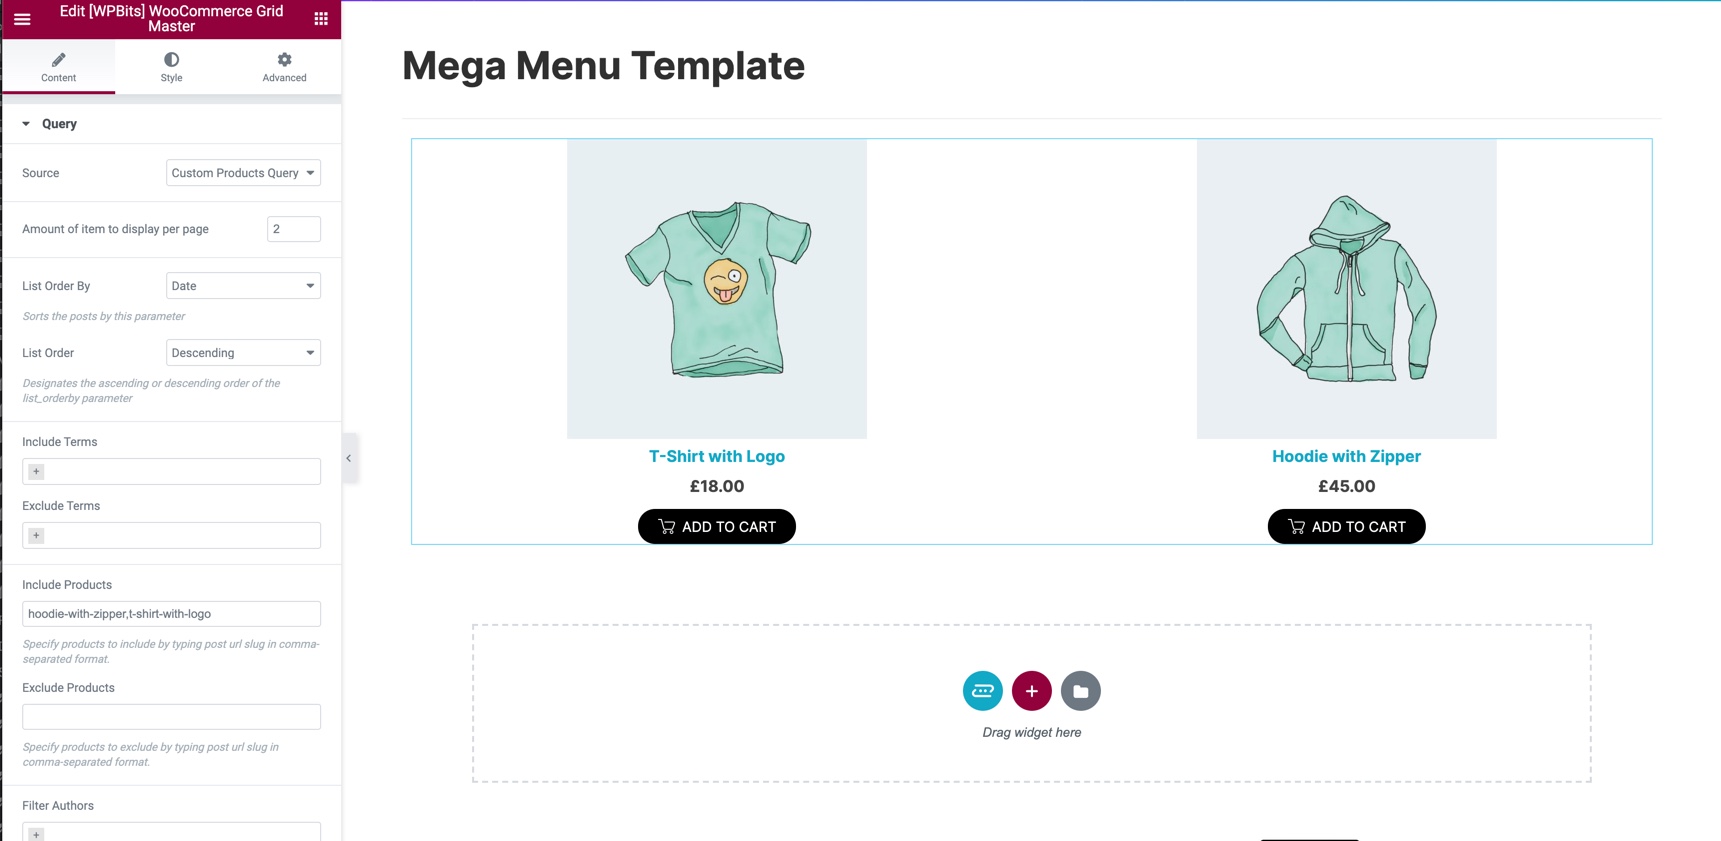
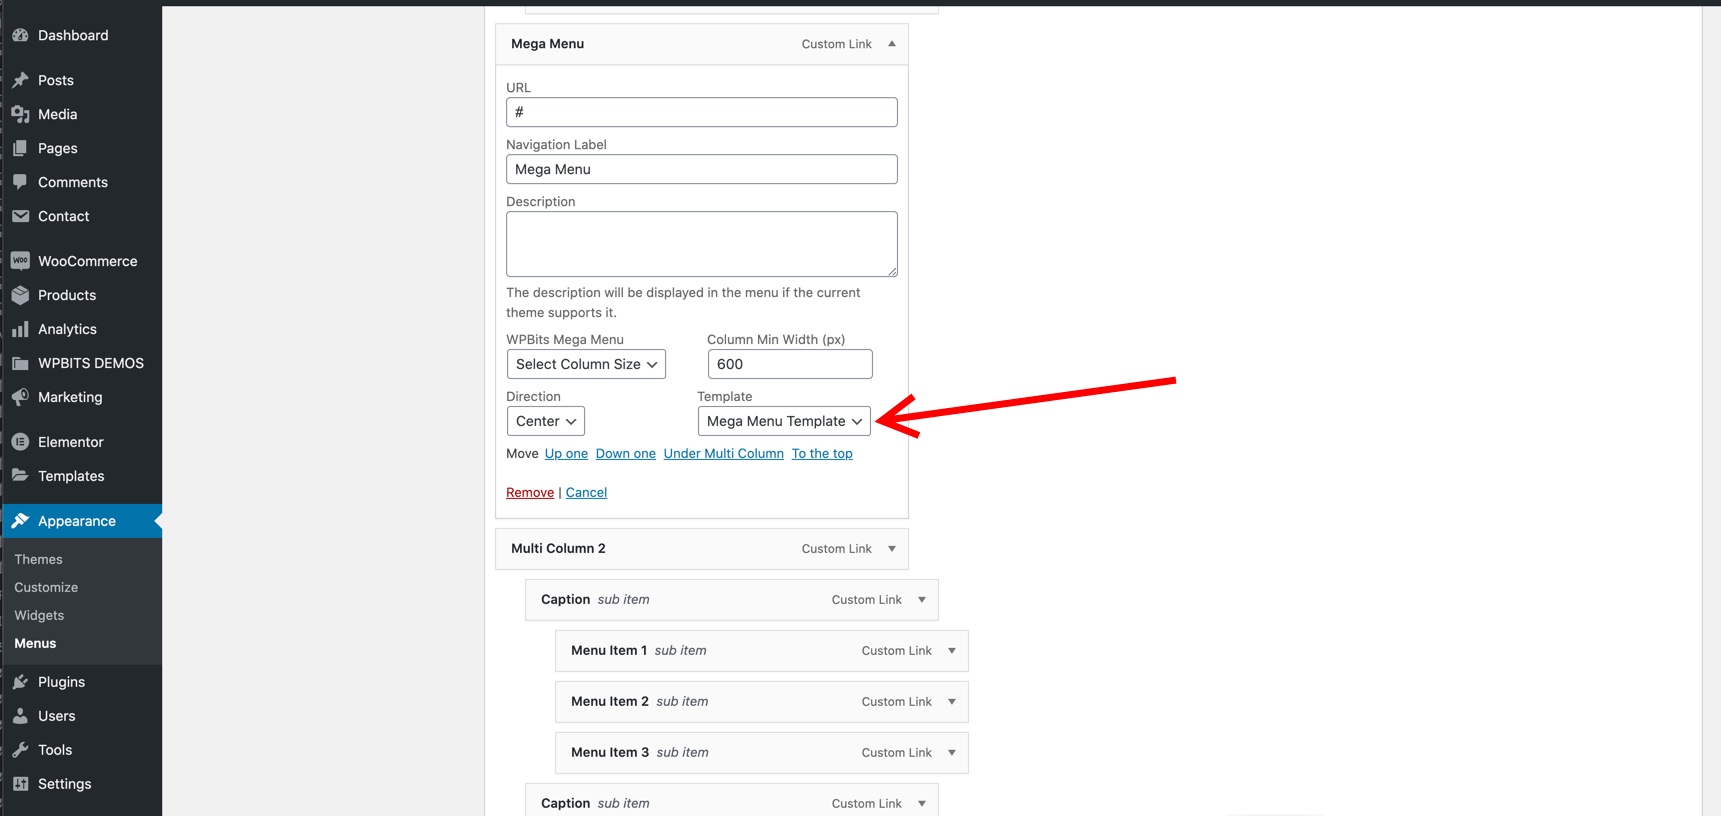
Mega menus are drop-down menus that display content created with Elementor. Use Elementor’s UI and widgets to create any content you want to be displayed as a mega menu in your navigation. In the following example, we have created a mega menu template that contains a WooCommerce Grid Master widget and assigned it to the “Mega Menu” top-level menu item. Here is a step-by-step guide to creating a mega menu.
We are going to use the WPBits Theme Builder templates. Please check this section if you don’t know how to create and assign a template to a site location.
-
Create a new template and assign it to the “Navigation” location.
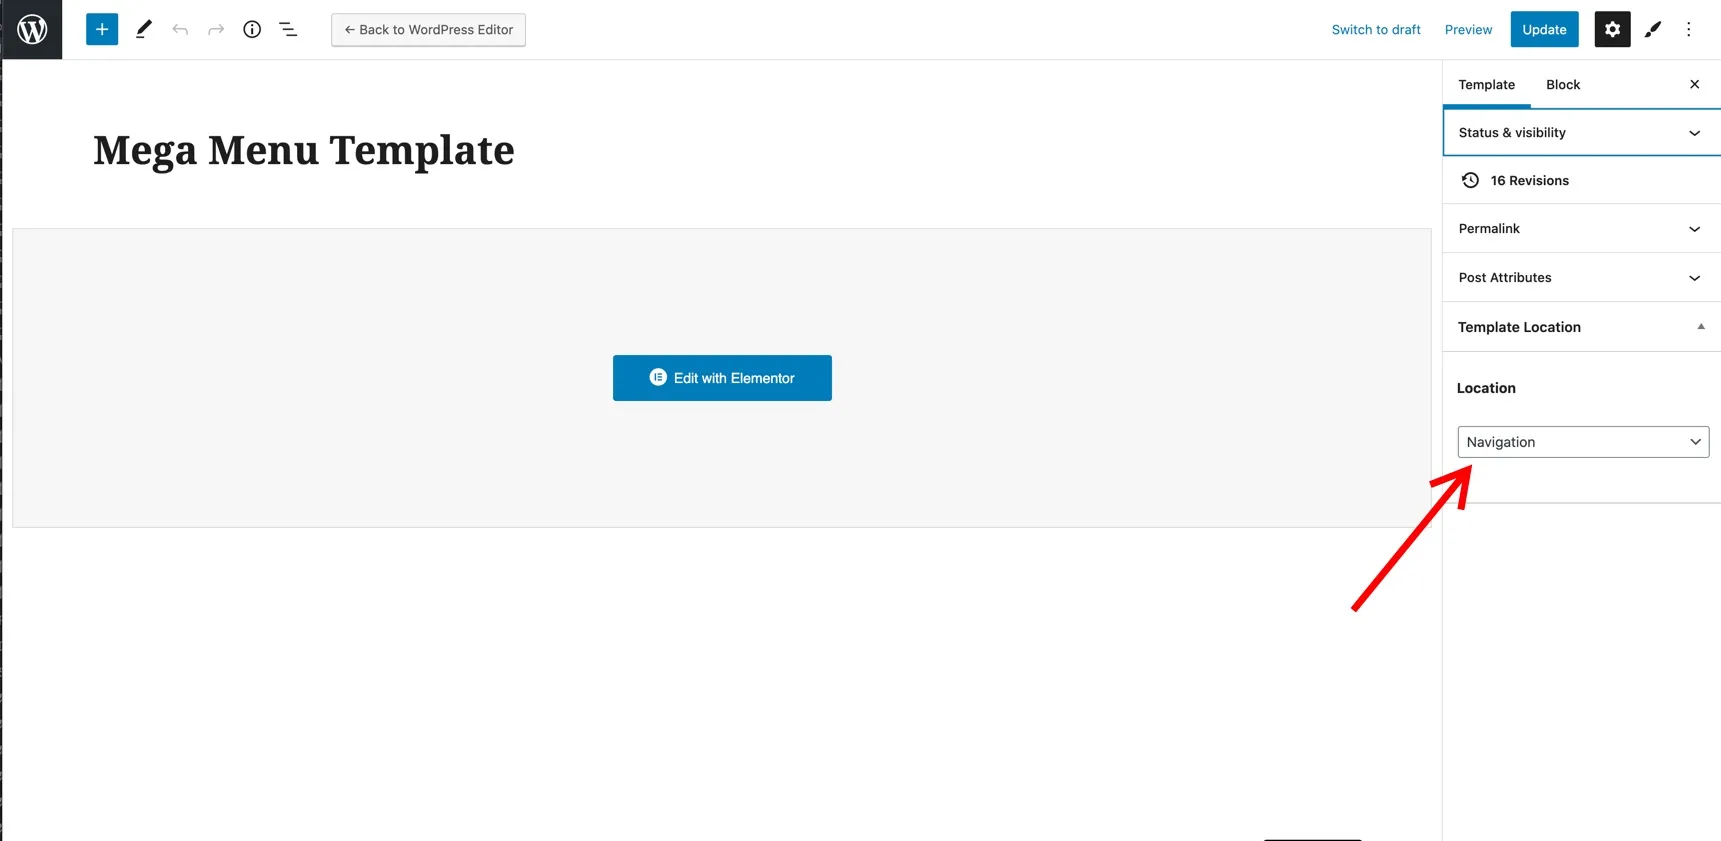
-
Edit the template with Elementor and create your content.
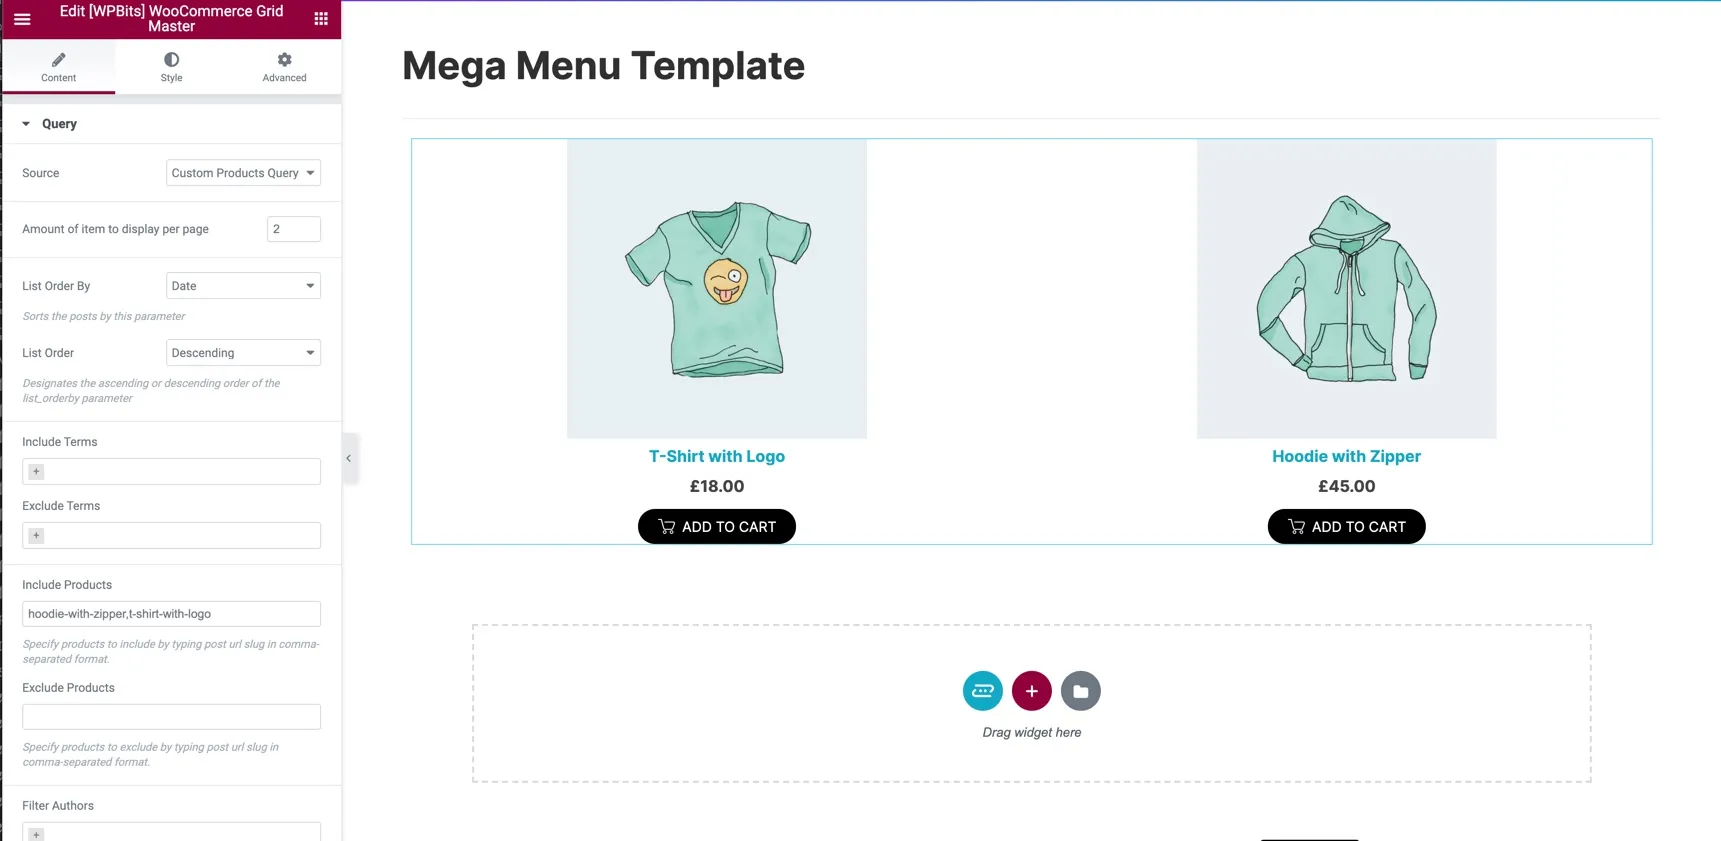
-
Assign the template to a top level menu item via the Template select menu.
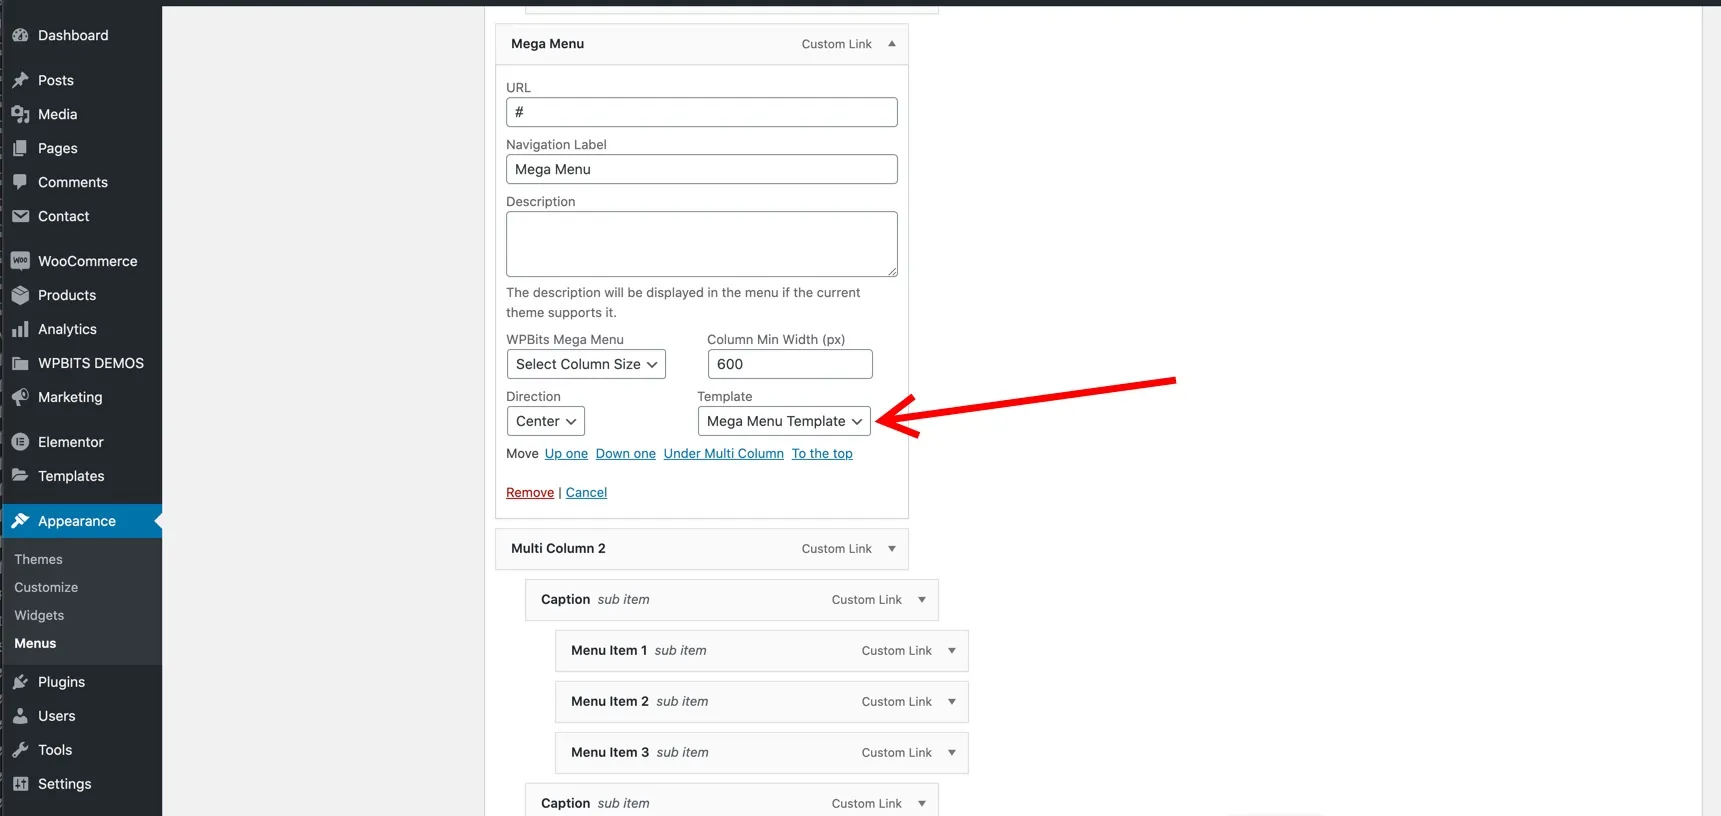
Decorative Slideshows
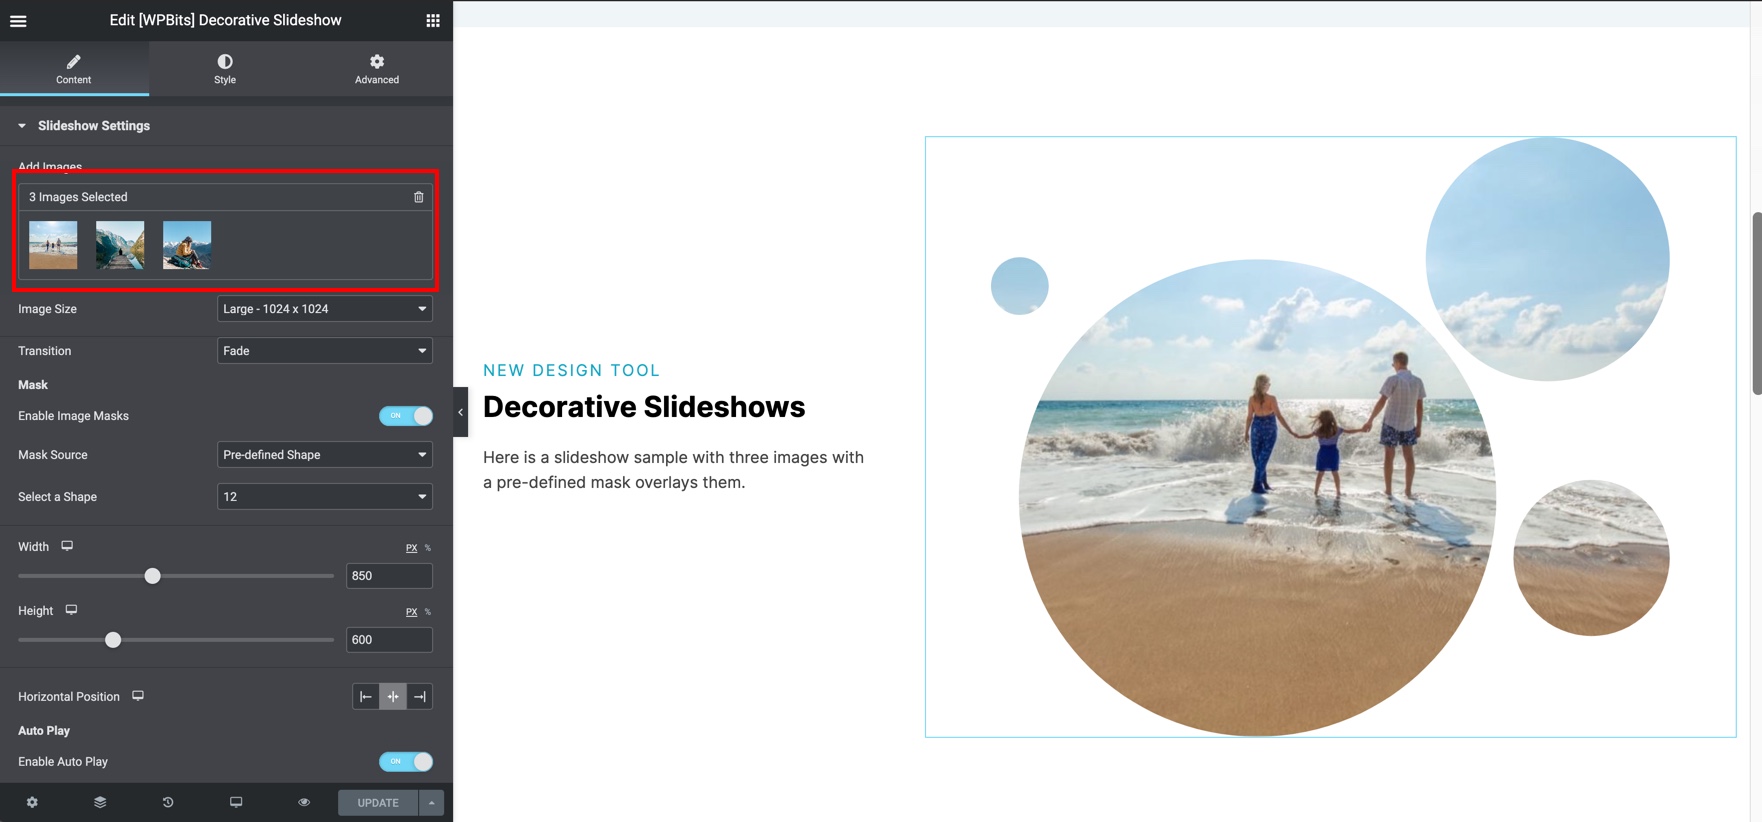
Section titled “Decorative Slideshows”- Use decorative slideshows to create an image slider with masks. Select your images, then select a pre-defined SVG mask or use your custom PNG or SVG images to create your own mask.
- There are pre-defined shapes available to use with any image you want.
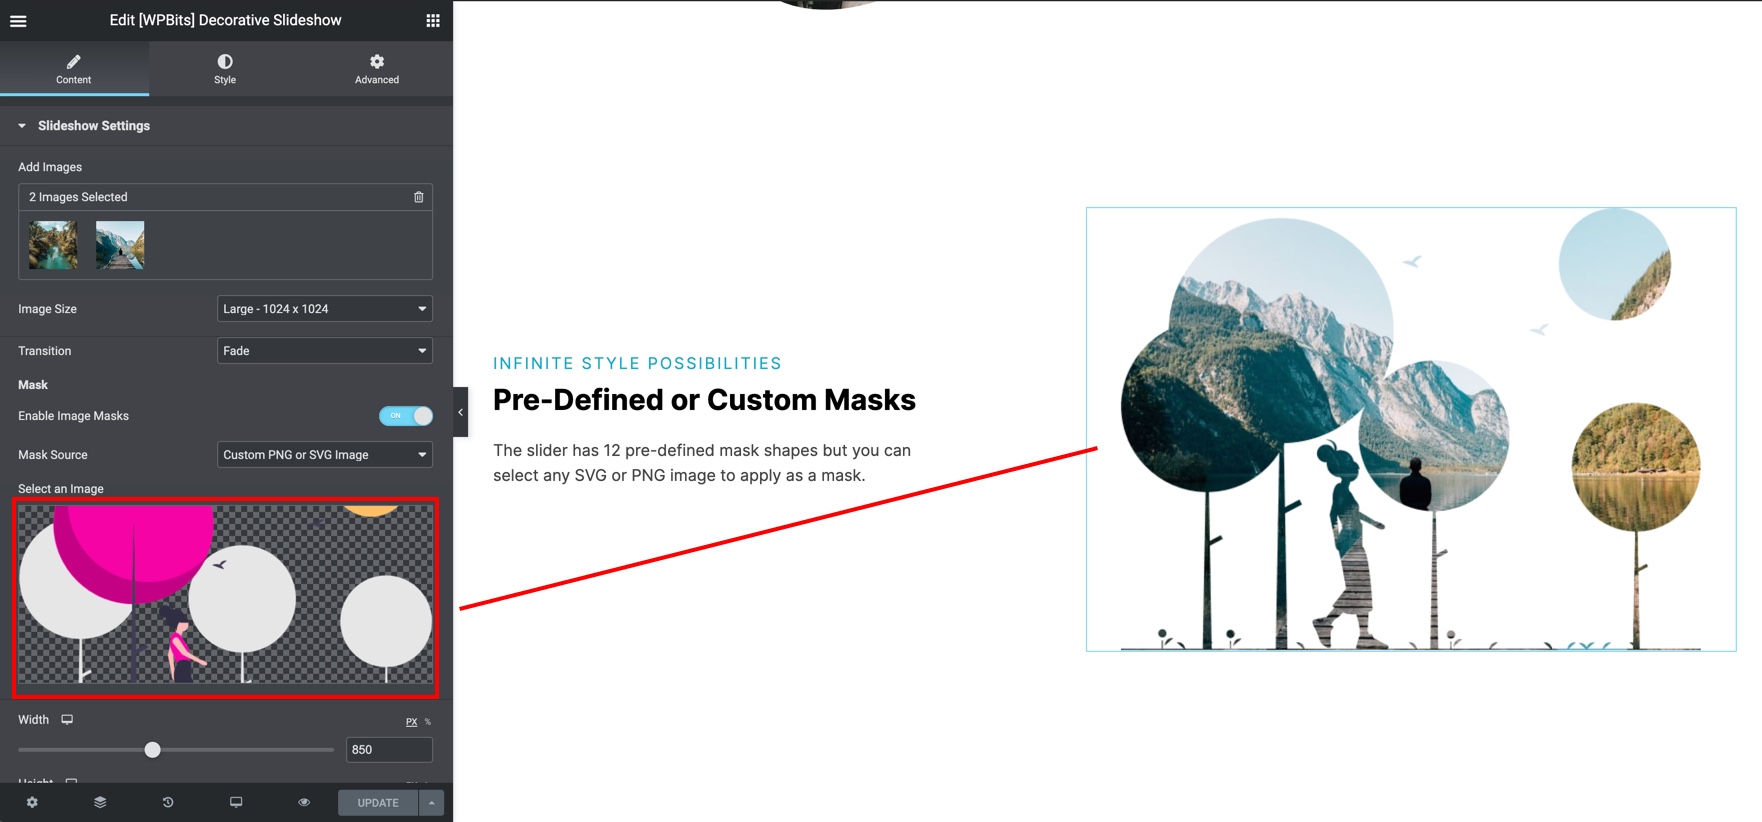
- If you want to use your own mask, change the “Mask Source” to upload a custom mask image. Mask images must be PNG or SVG and should contain transparent and filled areas. The filled (with any color) areas of your mask image will show the image, and the transparent areas will be masked.
One Page Navigation
Section titled “One Page Navigation”Use the One Page Navigation widget to add a navigation menu in a fixed position or sticky to the top of the window.
Navigation Links and Target Sections
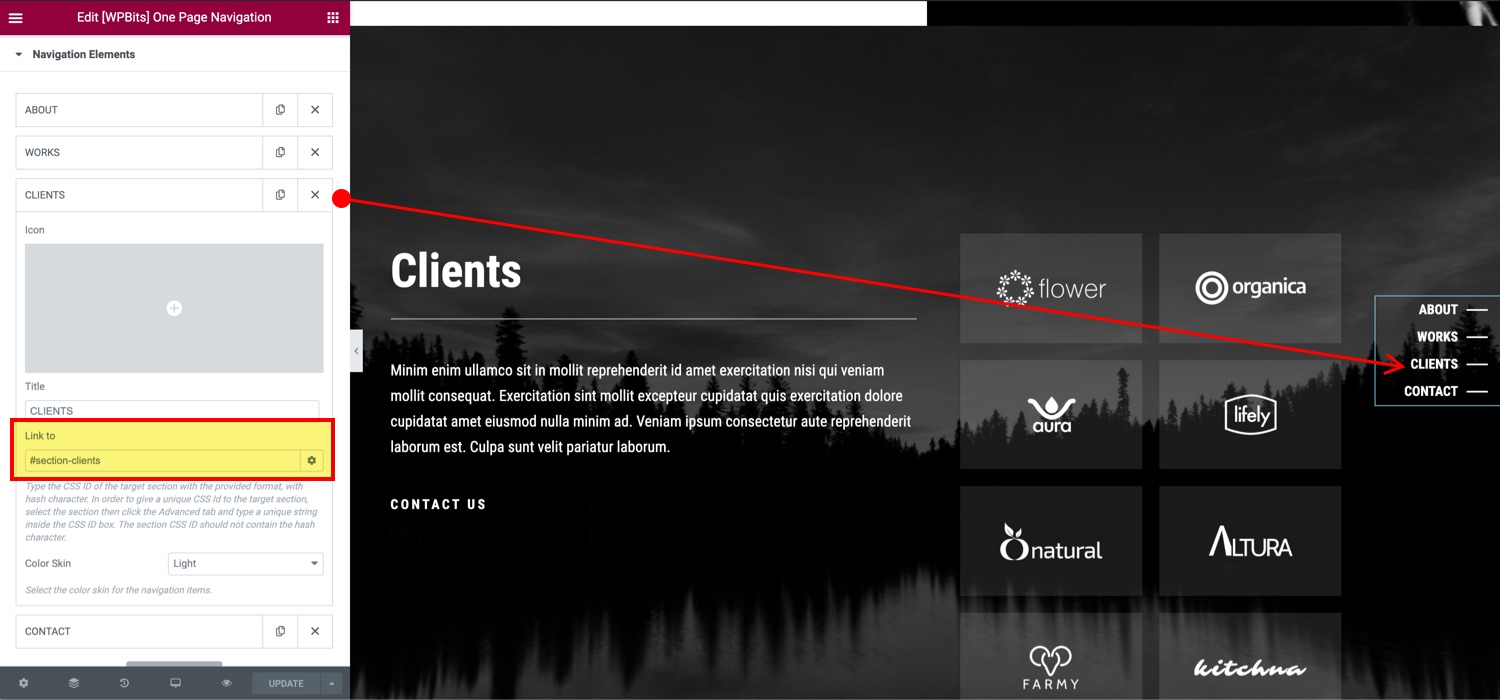
Section titled “Navigation Links and Target Sections”You can link the navigation items independently. However, if you are targeting an internal section on the same page, you need to mark that section with the same identifier given to the link. The only difference is that the “Link to” field should contain the ”#” character before the identifier.
For example, the following screenshot shows how the “Clients” navigation item is linked to the “section-clients” id.
In order to mark a section:
-
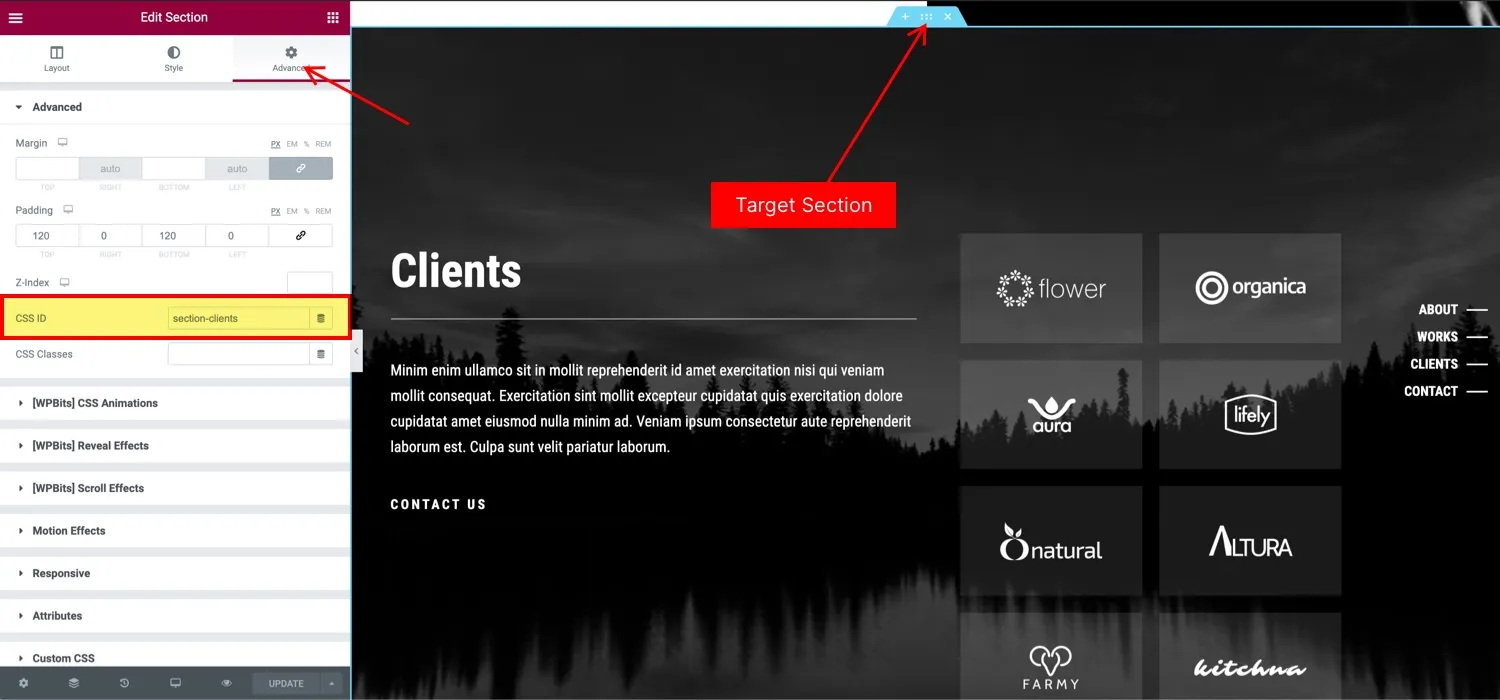
Open the “Edit Section” panel of the target section.
-
Navigate to the Advanced tab.
-
Use the CSS ID field to add your unique identifier. Don’t use spaces or special characters other than dashes or underscores.
Grid Masters
Section titled “Grid Masters”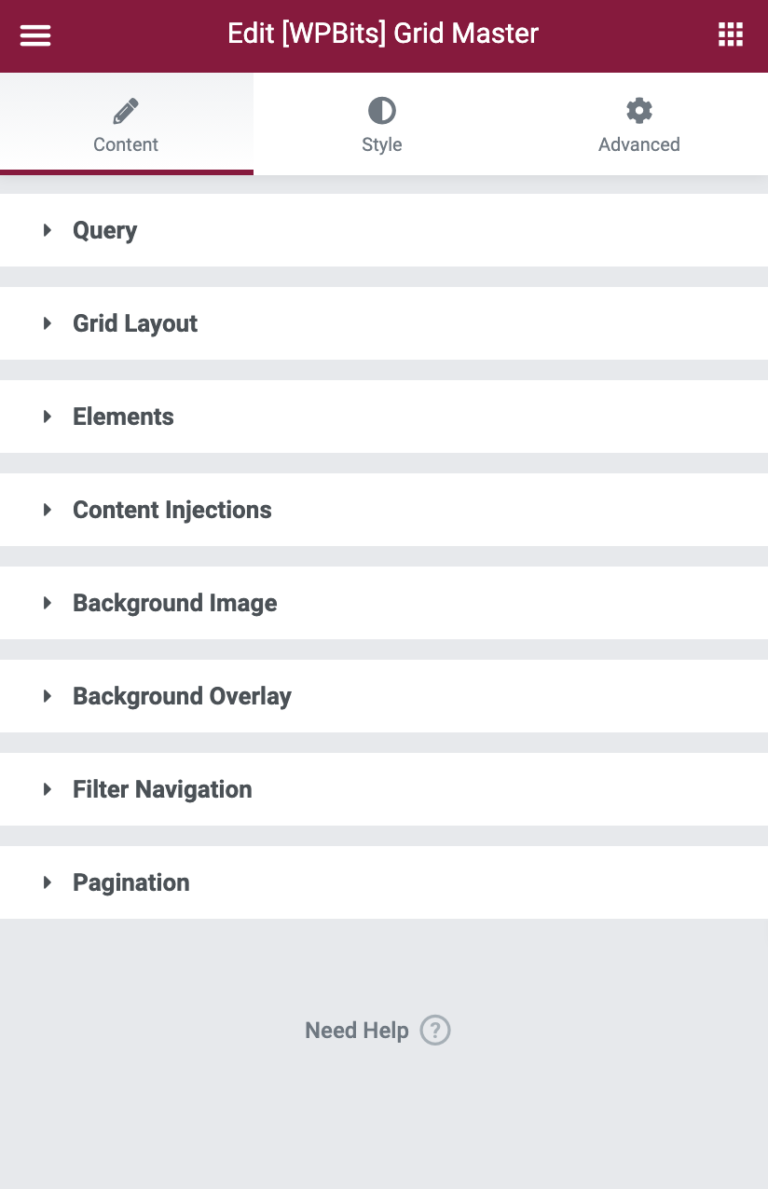
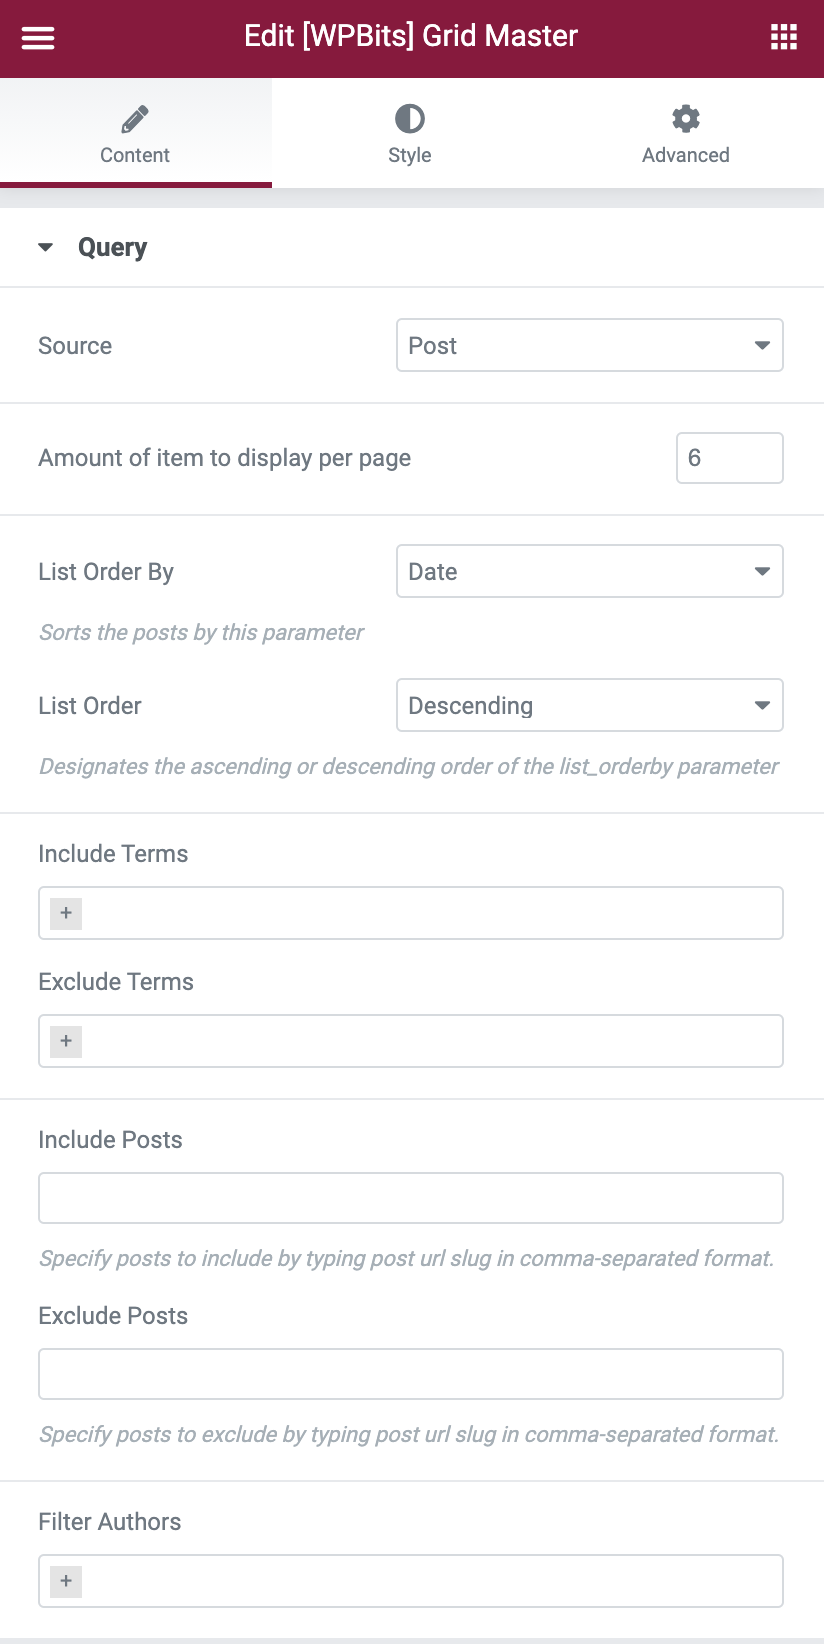
The Grid Master widget allows you to create any post loop you want from any custom post type. You can use your grid on a page individually or as a template for your archive pages by combining it with WPBits Templates.
- Select your source post type to display.
- Use the include/exclude/filter terms to specify your query.
- Change the order logic.
Grid Layout
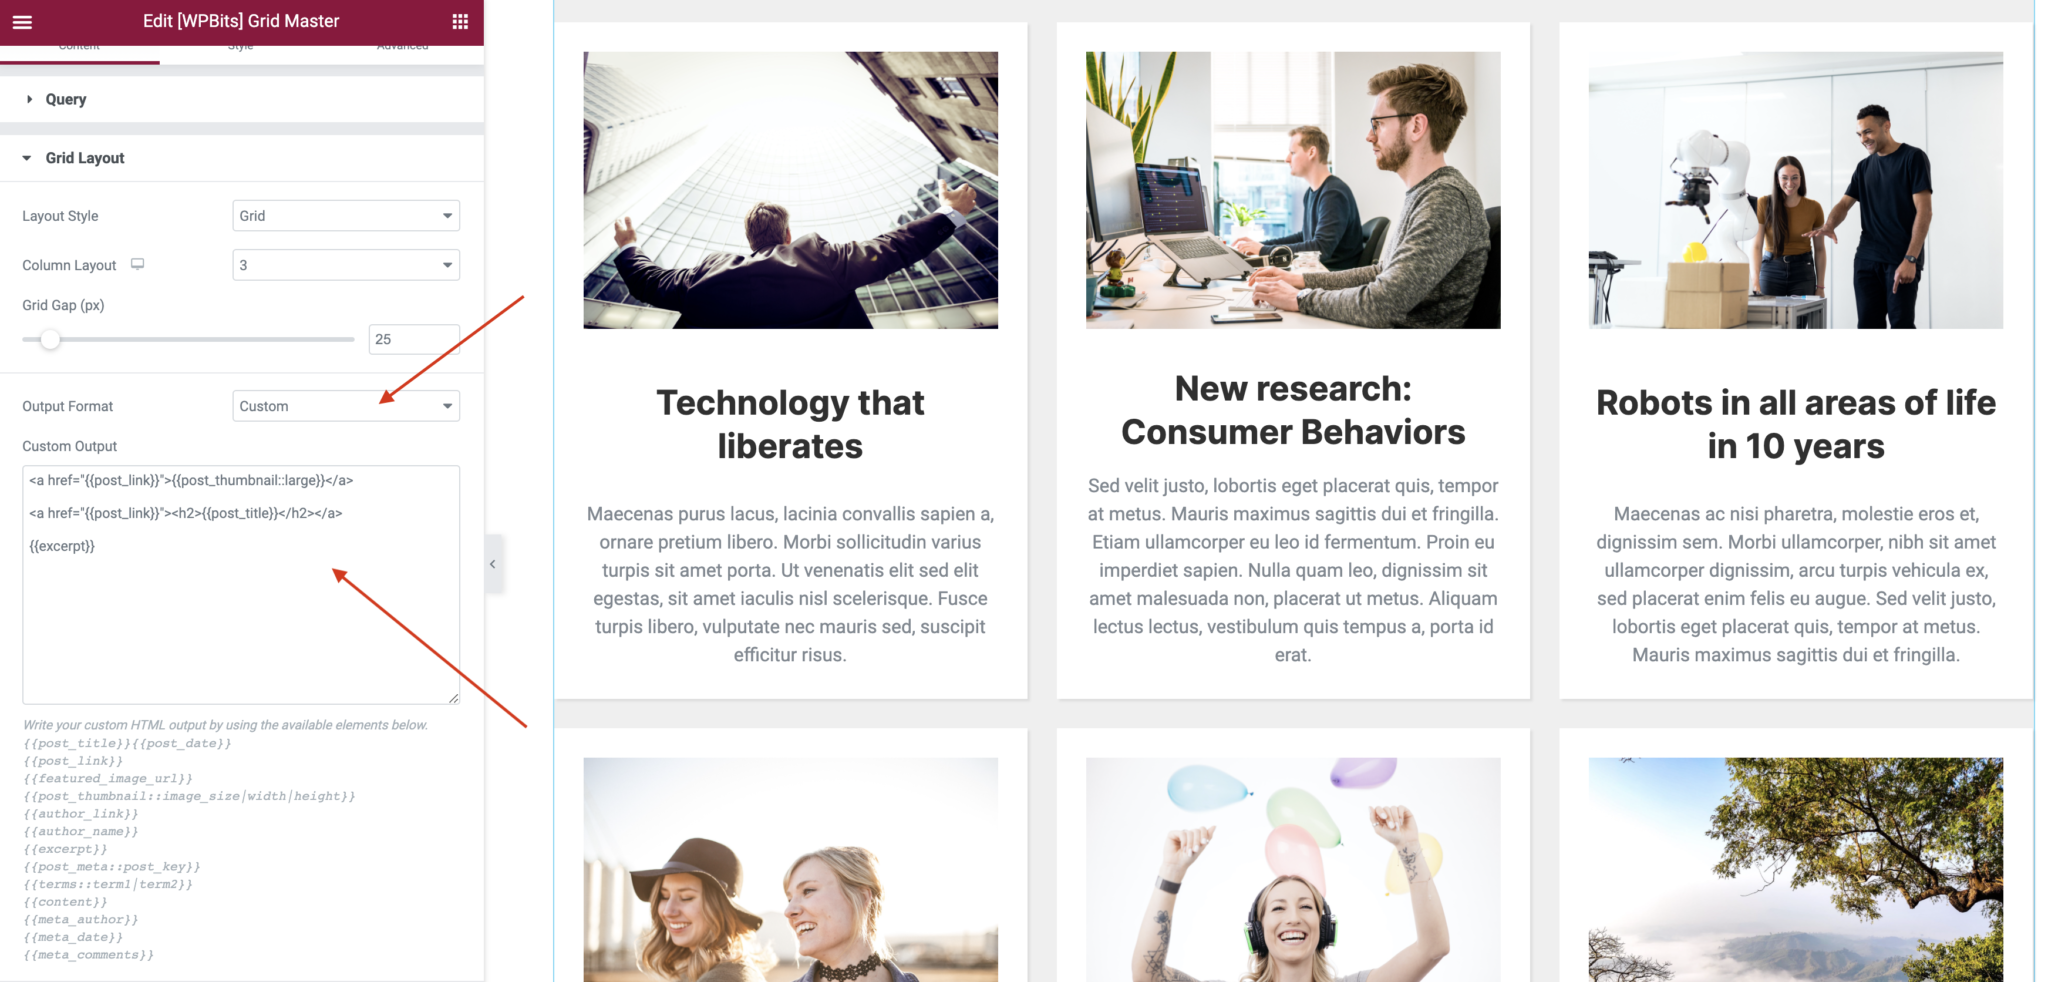
Section titled “Grid Layout”- Change the layout style, column size, etc. to customize the grid layout.
- Use the “Custom” option from the “Output Format” select box to take control of the final HTML output if you need to customize it.
Elements
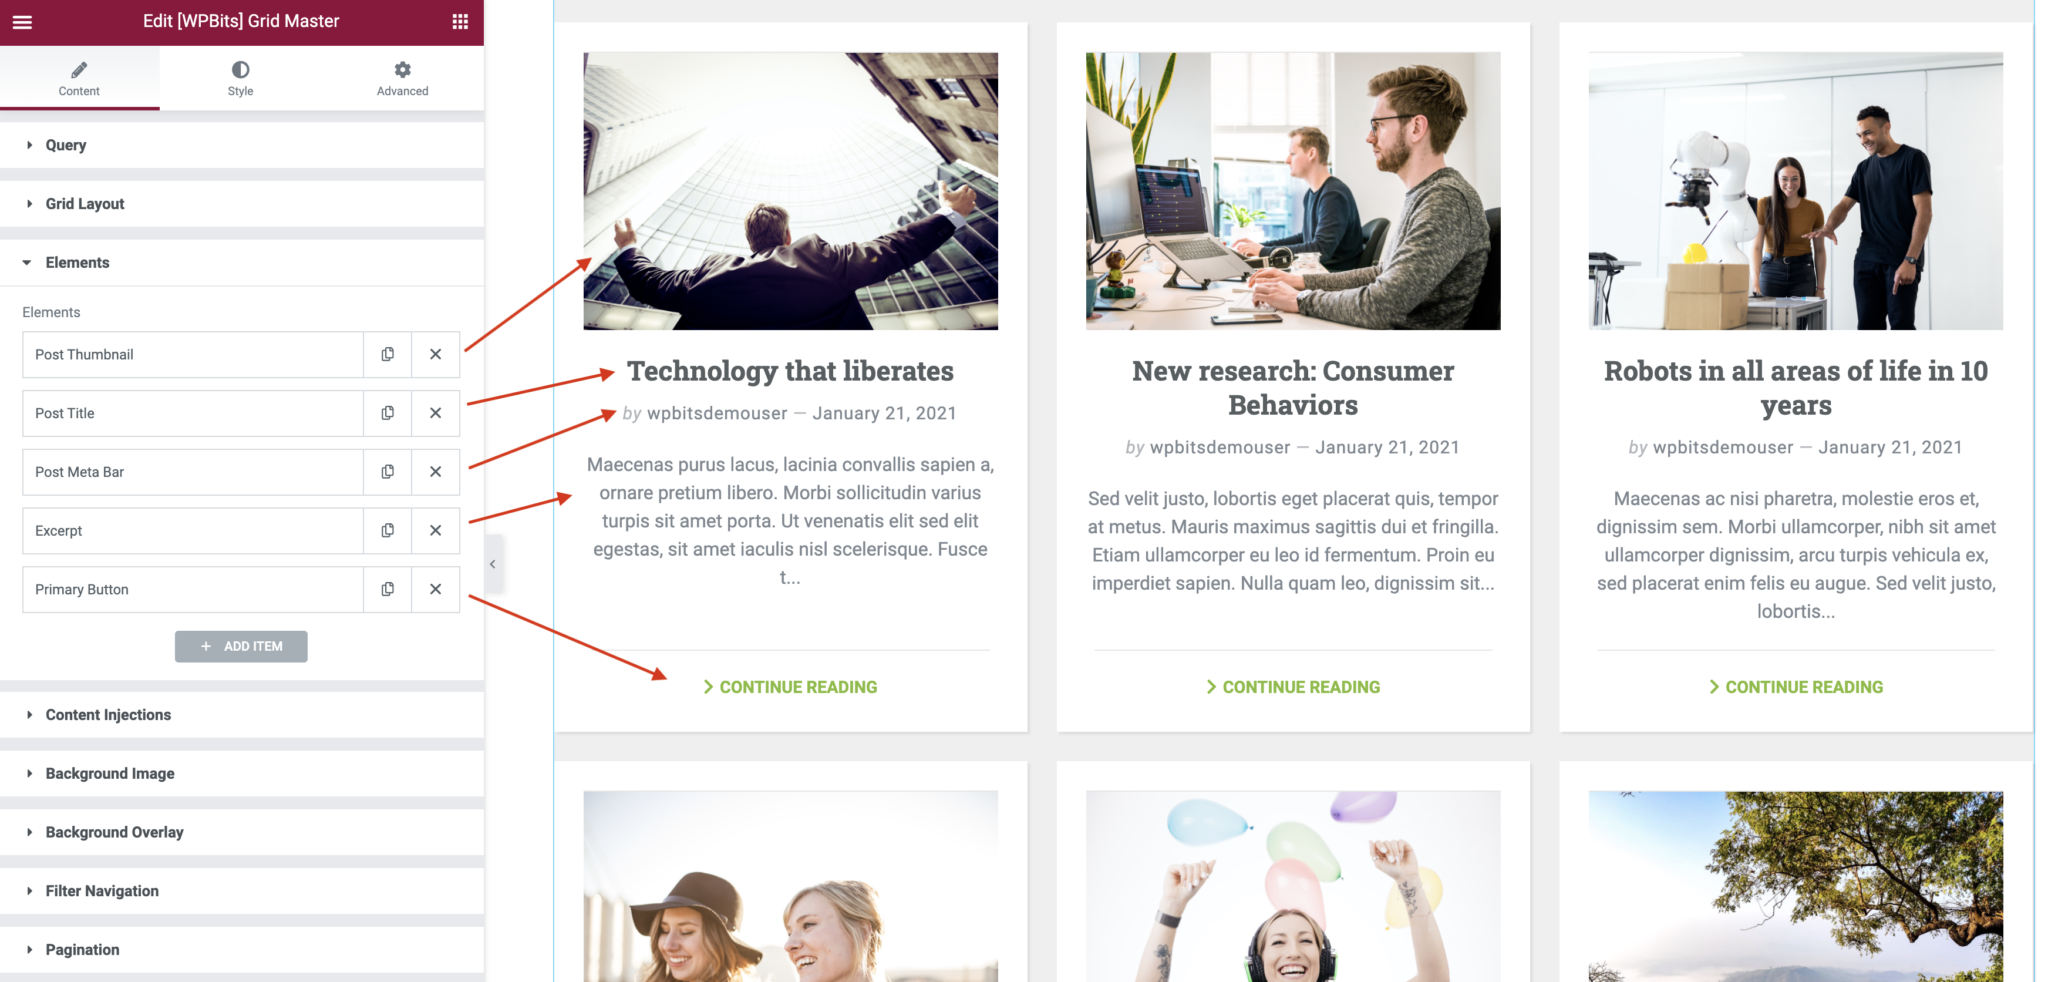
Section titled “Elements”- Elements are a group of components available to build the content of the grid.
- Use the “ADD ITEM” button to add a new element to your output.
- Every element has its own set of options. Expand an element to reach the options.
- You can customize the style of these elements from the “Style” tab.
Content Injections
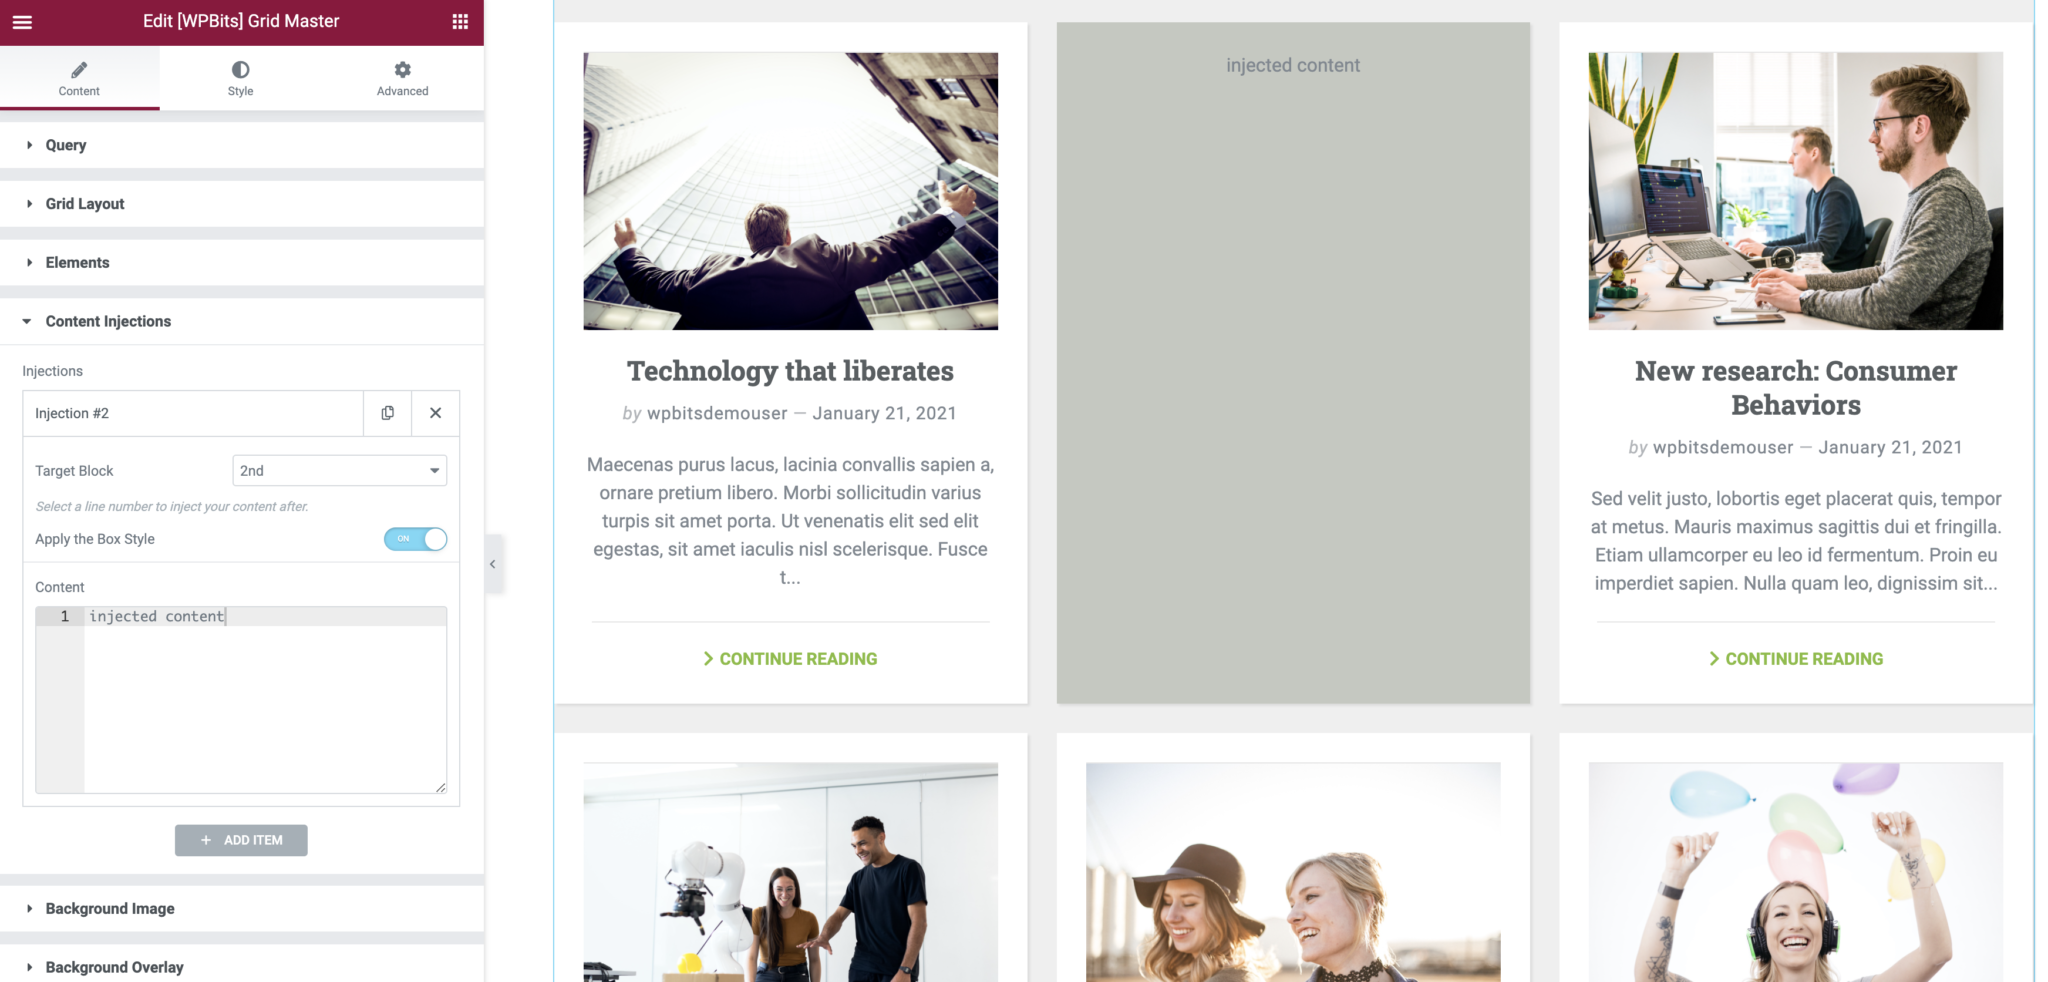
Section titled “Content Injections”You can inject your content, such as Google Adsense code, to be displayed between the post loop boxes. Some use cases of this feature include advertising banners or “call to action” content.
Filter Navigations
Section titled “Filter Navigations”The filter navigation can be used for many purposes.
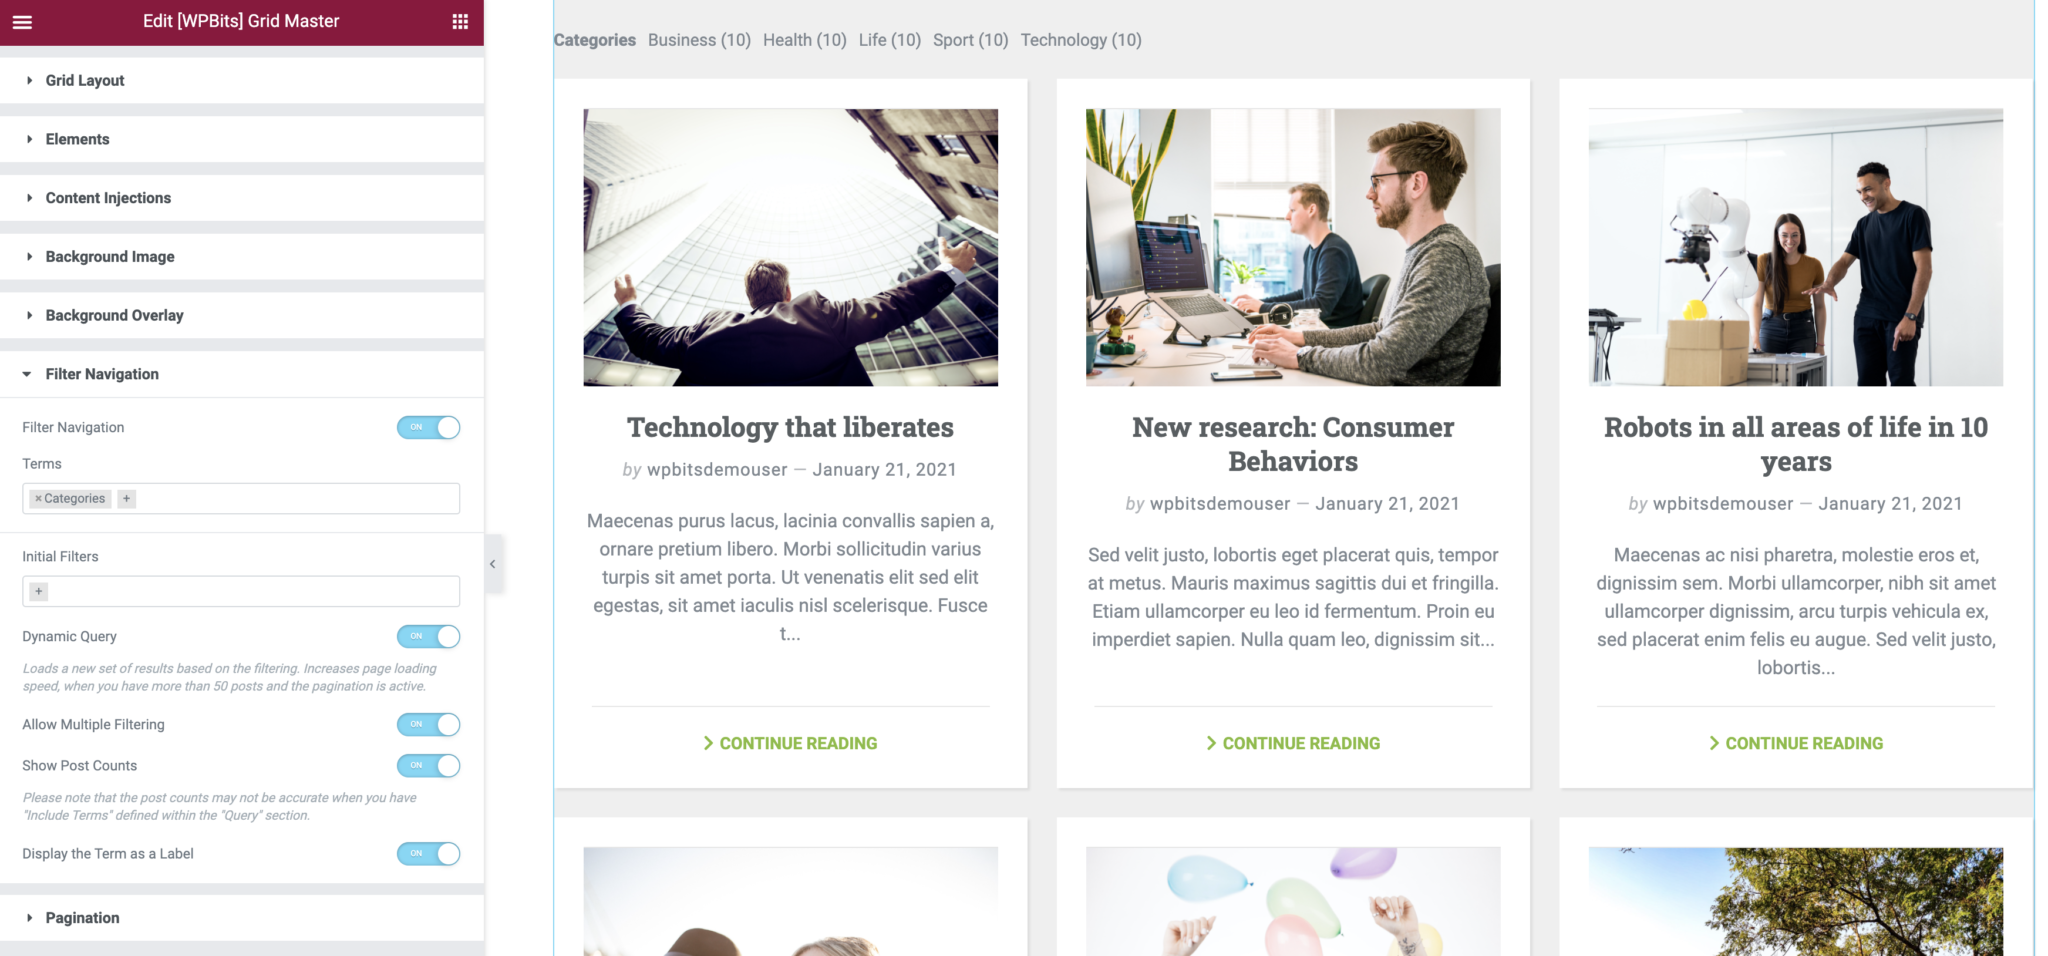
- Dynamic Query: The grid content (posts) will be replaced by sending a new query to the server when the user clicks on a navigation item. Note that this option won’t work when the grid is used as an archive template. Use this option to increase your page loading speed if you have more than 30 posts to show on the page.
- Use Styling Tab / Filter Navigation to change the navigation location and customize the styling.
Box Style
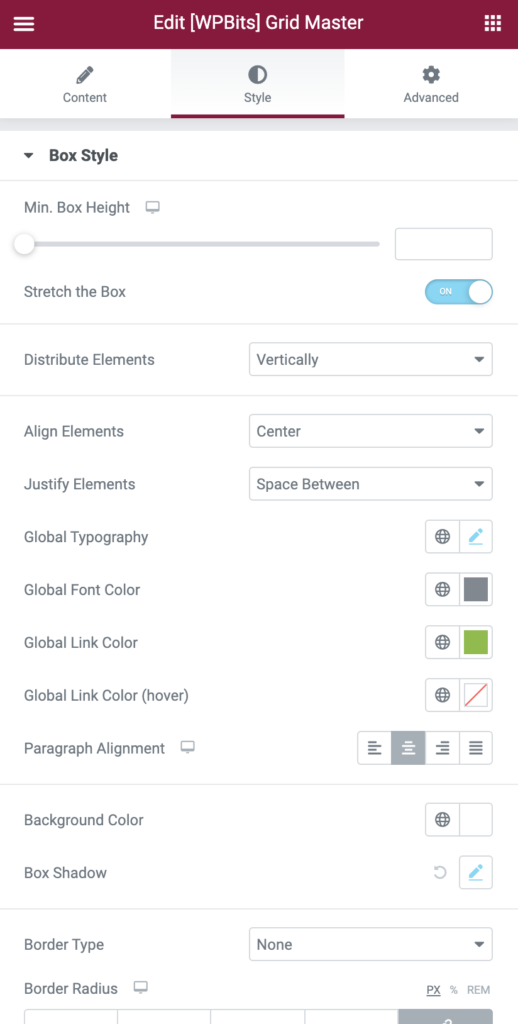
Section titled “Box Style”Use the “Box Style” settings to customize the box and items globally. Select a global font, set colors for all elements, change the box background, align elements, etc. Remember that almost every element has its own styling section with font type and color settings.
Element Wrappers
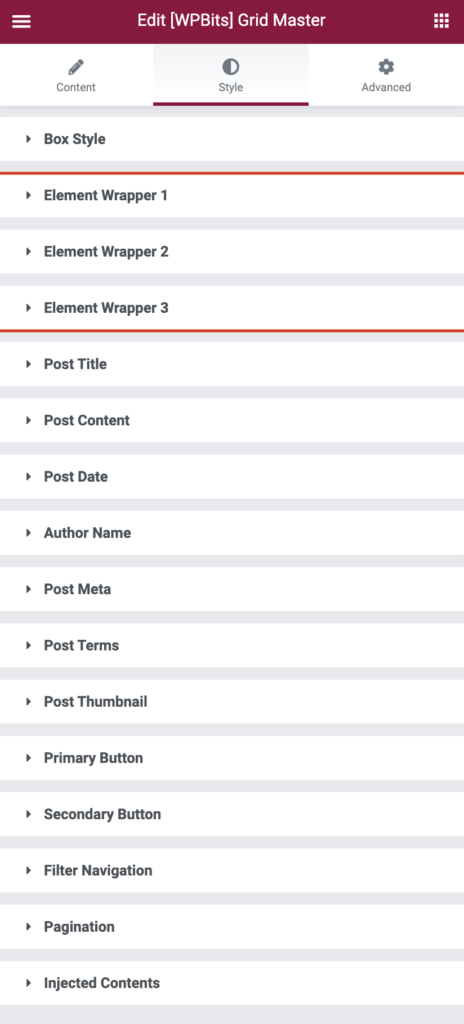
Section titled “Element Wrappers”Use Element Wrappers to distribute your grid elements into separate containers. There are 3 wrappers available. For example, if you have “Post Thumbnail”, “Post Title”, and “Excerpt” elements and you want to display the post thumbnail on the left side and the others on the right, you can use Element Wrapper 1 to wrap the post thumbnail and Element Wrapper 2 to wrap the others. Then, change the orientation of the two wrappers from the “Box Style” section.
You can import Grid Master templates from the WPBits Template Library and study how we used the element wrappers to create hover effects and advanced layouts.
WooCommerce Grid Master
Section titled “WooCommerce Grid Master”The WooCommerce version of the Grid Master widget. Visit the Grid Master section to learn how to use this widget.
Carousel Master
Section titled “Carousel Master”Use this widget to create a post carousel from a selected source. The Carousel Master widget uses the same design logic as the Grid Master widget. Visit the Grid Master section to learn how to create and design your loop elements.
WooCommerce Carousel Master
Section titled “WooCommerce Carousel Master”Use this widget to create product carousels. The WooCommerce Carousel Master widget uses the same design logic as the Grid Master widget. Visit the Grid Master section to learn how to create and design your loop elements.