

Create Blocks
Creating custom Gutenberg blocks with WPBits Block Studio is straightforward. This guide walks you through the process.
Getting Started
Section titled “Getting Started”- Navigate to WPBits Block Studio in your WordPress admin menu
- Click Create New Block
- Fill in the basic block information
Block Settings
Section titled “Block Settings”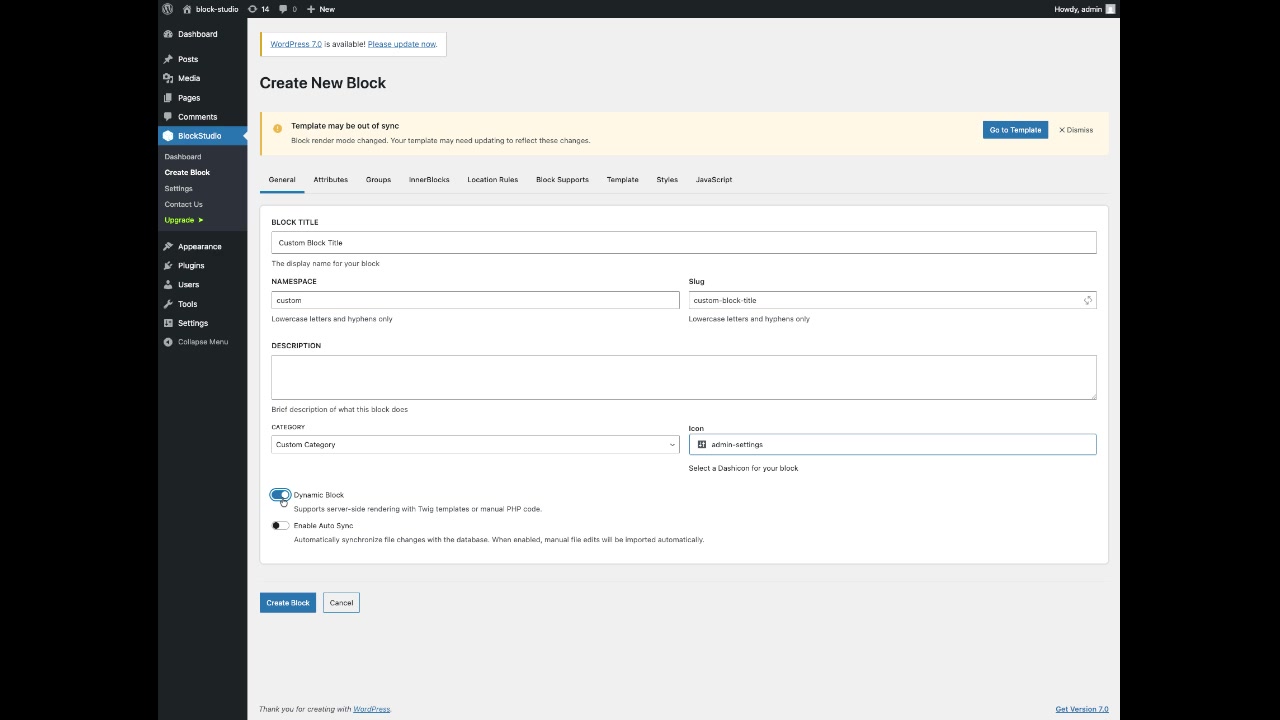
When creating a block, you’ll configure:
- Block Title - The display name of your block
- Namespace - Unique identifier for your block (e.g.,
custom) - Slug - Auto-generated from the title
- Description - What your block does
- Category - Where your block appears in the block inserter
- Icon - Choose from Dashicons
Block Modes
Section titled “Block Modes”WPBits Block Studio supports three rendering modes:
| Mode | Description |
|---|---|
| Static Block | Uses Twig template only (template.twig) |
| Dynamic Block | Uses PHP callback with optional Twig template |
| Custom Render | Uses custom render.php when Custom Render Mode is enabled |
Attributes
Section titled “Attributes”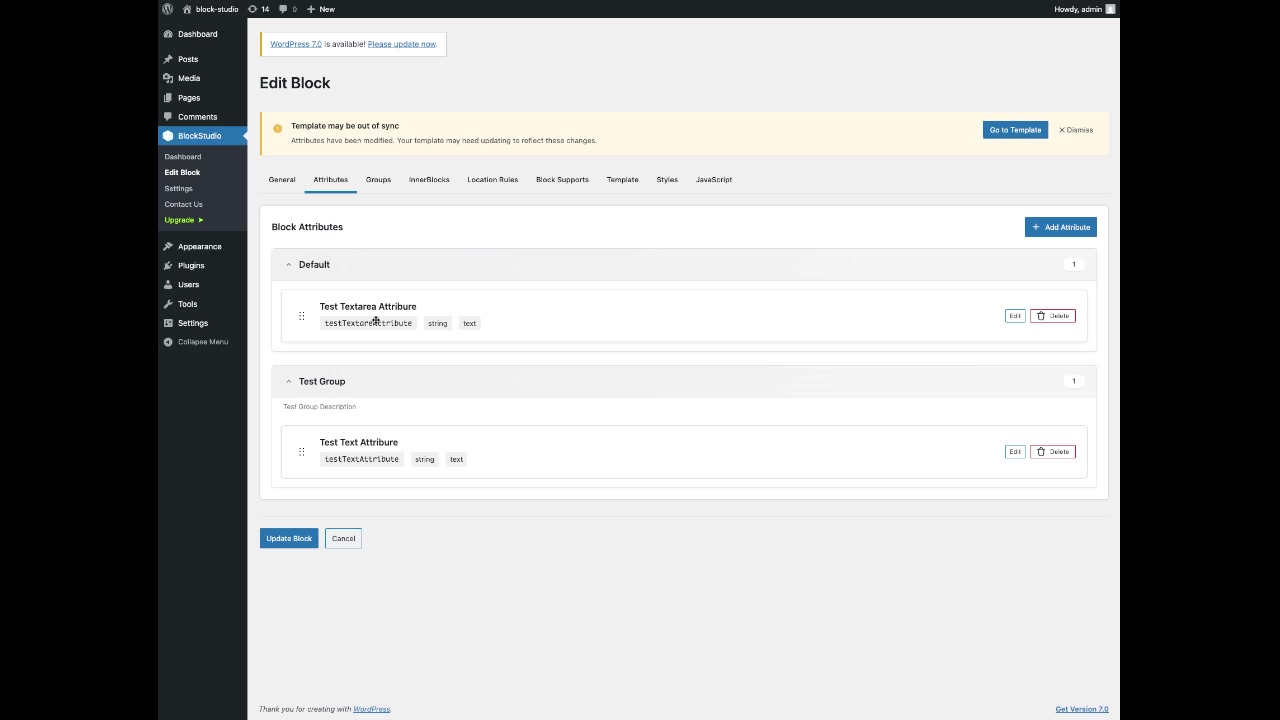
Attributes define the data your block stores. Each attribute has:
- Name - Unique identifier for the attribute
- Label - Display label in the editor
- Group - Organize attributes into groups
- Control Type - Choose from 20 control types
- Default Value - Initial value
- Help Text - Instructions for users
- Required - Make the field mandatory
Add Attribute
Section titled “Add Attribute”- Go to the Attributes tab
- Click + Add Attribute
- Fill in the attribute details
- Click Add Attribute
Block Supports
Section titled “Block Supports”Block Supports enable Gutenberg features for your block:
- align - Wide align and full align
- color - Text and background colors
- spacing - Padding and margin
- typography - Font size and family
- border - Border controls
- shadow - Box shadow controls
To enable:
- Click the Block Supports tab
- Check the features you want to enable
- Configure any additional options
Location Rules
Section titled “Location Rules”Control where your block can be used:
- Post Types - Choose which post types can use this block
- Post Status - Filter by publish status
- User Roles - Restrict by user capability
Attribute Groups
Section titled “Attribute Groups”Organize your attributes into logical groups:
- Go to the Groups tab
- Click + Add Group
- Enter a Group Key (e.g.,
testGroup) - Enter a Group Title (e.g.,
Test Group) - Toggle Initially Open if desired
- Add a description
- Click Add Group
InnerBlocks
Section titled “InnerBlocks”InnerBlocks allow your block to contain other blocks:
- Enable InnerBlocks - Toggle to allow nested blocks
- Allowed Blocks - Choose which blocks can be inserted
- Template Lock - Control whether users can modify the template
- Orientation - Vertical or horizontal layout
Using Your Block
Section titled “Using Your Block”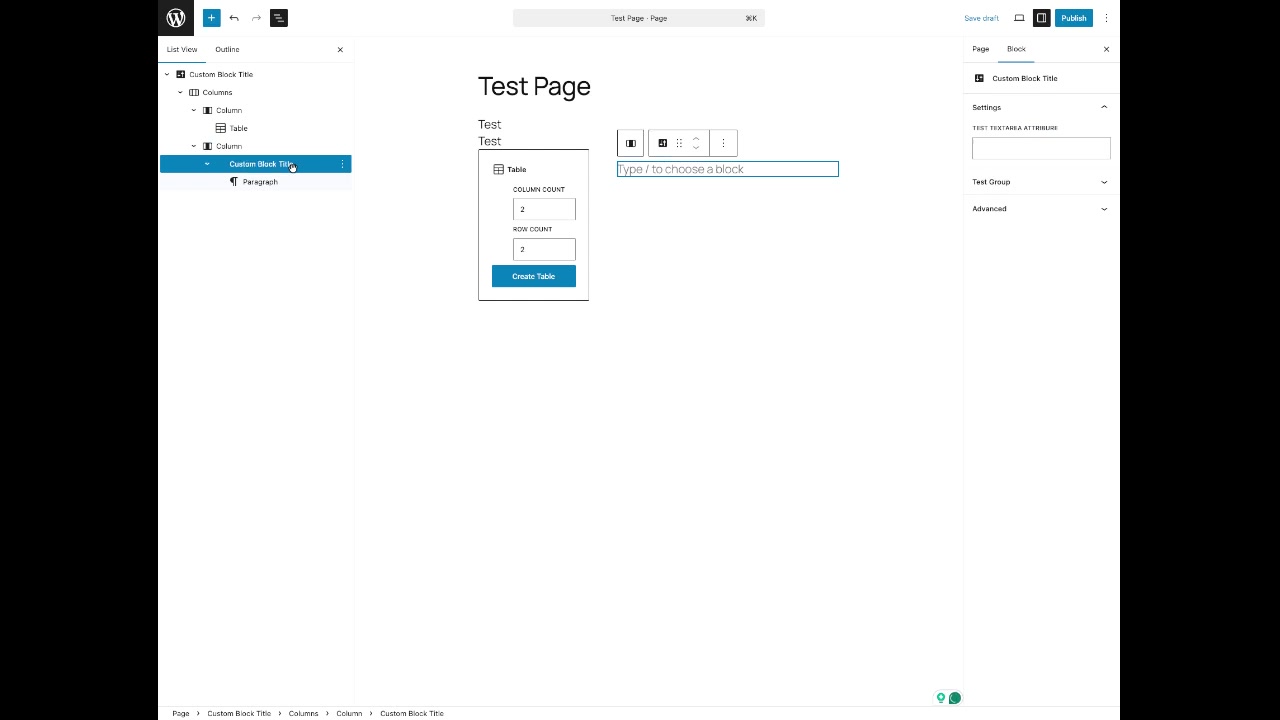
Once created, your block appears in the Gutenberg editor:
- Add it like any other block
- Configure attributes in the right sidebar
- Nested blocks render in the editor canvas
Next Steps
Section titled “Next Steps”- Learn about Control Types to add input fields
- Explore the Twig Template System for frontend rendering
- Enable Pro Features for advanced capabilities